How to Easily Trim Objects in Blender with A Clean Cut
To Trim or cut objects in Blender can sometimes seem impossible as the tools in Blender will only allow you to cut only through the meshes. As a result, you will sometimes end up in a situation where you cannot find a proper way to cut your object. In this tutorial, we will show you a way to create a tool using which you can make your own custom cut on the shape from above. However, you can develop this tool in a way that it can cut from all angles.
Making A Tool to Trim Objects in Blender
- For drawing the pattern.
- For applying the cut with the pattern drawn by the user.
import  bpy
import bmesh
import math

####################################################################
#####                Utility Functions
####################################################################
class BOOLEAN_TYPE:
    UNION = 'UNION'
    DIFFERENCE = 'DIFFERENCE'
    INTERSECT = 'INTERSECT'

def make_boolean(obj1, obj2, boolean_type):
    if not obj1 or not obj2:
        return

    modifier = obj1.modifiers.new(name='booly', type='BOOLEAN')
    modifier.object = obj2
    modifier.operation = boolean_type
    res = bpy.ops.object.modifier_apply({"object": obj1}, apply_as='DATA', modifier=modifier.name)

    assert "FINISHED" in res, "Error"
The above function will apply the boolean operation on the object specified according to the type of boolean categorized in the class BOOLEAN_TYPE.
def delete_object(objName):

    bpy.ops.object.select_all(action='DESELECT')
    bpy.data.objects[objName].select_set(True) # Blender 2.8x
    bpy.ops.object.delete()
The above function will delete any given object. To delete an object, we need to first
deselect all the other objects and then select the object that we specified its name in
the function and finally delete the selected object.
def get_object_by_name(obj_name):
    assert obj_name in bpy.data.objects, "Error getting object by name:	{}".format(obj_name)
    obj = bpy.data.objects[obj_name]
    return obj
The above function will get the object by its name. Meaning that it will select it
according to the name given.
####################################################################
########             Main Panel
####################################################################

class MainPanel(bpy.types.Panel):
    bl_label = "Object Adder"
    bl_idname = "VIEW_PT_MainPanel"
    bl_space_type = 'VIEW_3D'
    bl_region_type = 'UI'
    bl_category = 'Design Automation'

    def draw(self, context):
        layout = self.layout
        layout.scale_y = 1.2

        row = layout.row()
        row.label(text= "Design Automation", icon= 'OBJECT_ORIGIN')
        row = layout.row()
        row.operator("wm_trim.myop", text= "Trim from above")
        row = layout.row()
        row.operator("wm_confirm.myop", text= "Confirm the cut")

####################################################################
####                  Main UI ّFunctions
####################################################################

class WM_Trim_myOp(bpy.types.Operator):
    """Draw The trim pattern"""
    bl_label = "Draw The trim pattern"
    bl_idname = "wm_trim.myop"

    def execute(self, context):

        bpy.ops.curve.primitive_nurbs_curve_add(enter_editmode=False, align='WORLD', location=(0,0,0))
        bpy.ops.object.editmode_toggle()
        bpy.context.scene.tool_settings.curve_paint_settings.curve_type = 'BEZIER'
        bpy.ops.curve.delete(type='VERT')

        return {'FINISHED'}
    def invoke(self, context, event):
        return context.window_manager.invoke_props_dialog(self)
In the above class, we have provided everything for the user to easily draw a pattern. This preparation contains creating a Nurbs Curve, switching to edit mode, specifying the type of the curve as Bezier, and deleting a curve. All of these tasks provide means for the user to draw another curve for trimming.
class WM_Confirm_myOp(bpy.types.Operator):
    """Click OK to confirm"""
    bl_label = "Click OK to confirm"
    bl_idname = "wm_confirm.myop"
    name = bpy.props.StringProperty(name= "Enter the name of the object to be trimmed", default= "")

    def execute(self, context):

        name = self.name
        bpy.context.object.data.dimensions = '2D'
        bpy.context.object.data.fill_mode = 'BOTH'
        bpy.context.object.data.extrude = 1000
        bpy.ops.object.editmode_toggle()
        context = bpy.context
        scene = context.scene
        cut = scene.objects.get("NurbsCurve")
        bpy.ops.object.convert(target='MESH')

        obj1 = get_object_by_name('%s'%name)
        obj2 = get_object_by_name('NurbsCurve')

        make_boolean(obj1, obj2, 'DIFFERENCE')
        delete_object("NurbsCurve")
        #fixMesh('%s'%name)

        return {'FINISHED'}
    def invoke(self, context, event):
        return context.window_manager.invoke_props_dialog(self)
The above class will fill the curve and extrude it for the height of 1000 mm (You can increase the number if you have a larger object than that height) and switches back to object mode then it will subtract the created object from the main object.
Don’t forget to add the ending of your script:
####################################################################
#####                     Register and Unregister
####################################################################


def register():
    bpy.utils.register_class(MainPanel)
    bpy.utils.register_class(WM_Trim_myOp)
    bpy.utils.register_class(WM_Confirm_myOp)


def unregister():
    bpy.utils.unregister_class(MainPanel)
    bpy.utils.unregister_class(WM_Trim_myOp)
    bpy.utils.unregister_class(WM_Confirm_myOp)


if __name__ == "__main__":
    register()
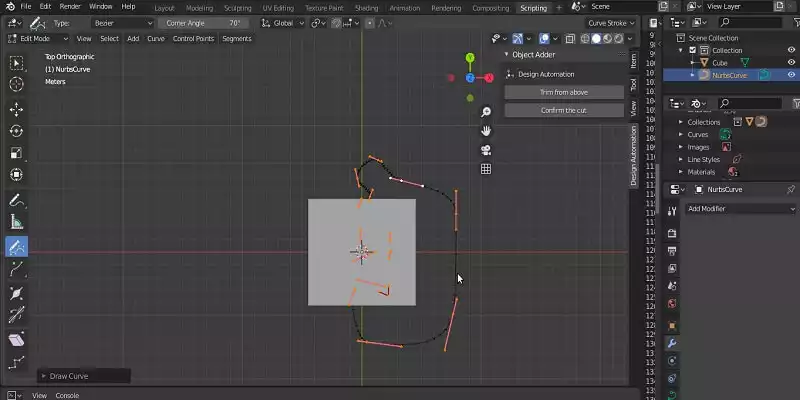
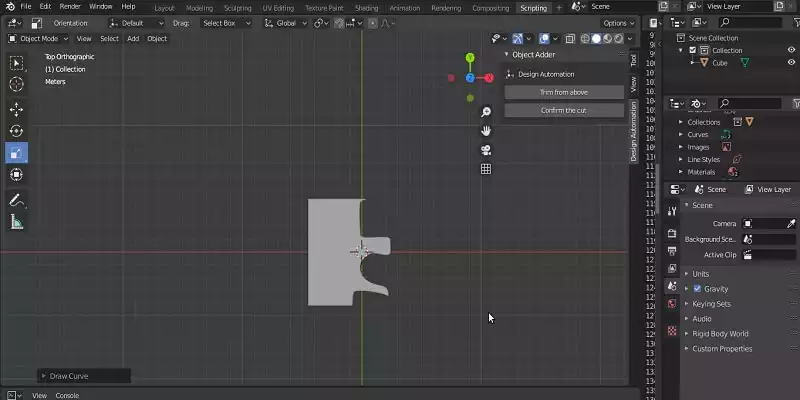
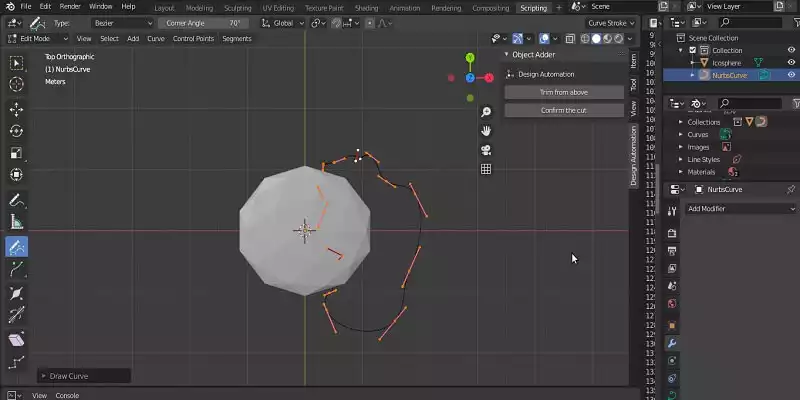
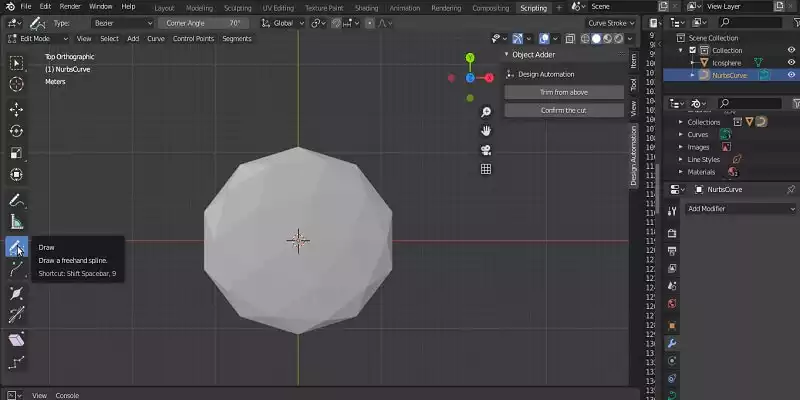
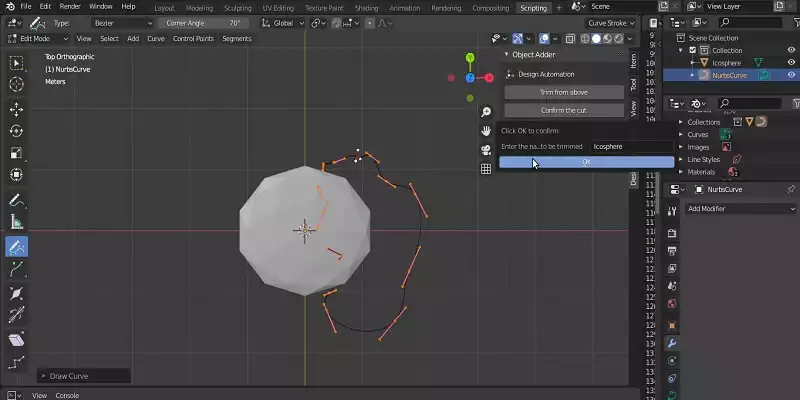
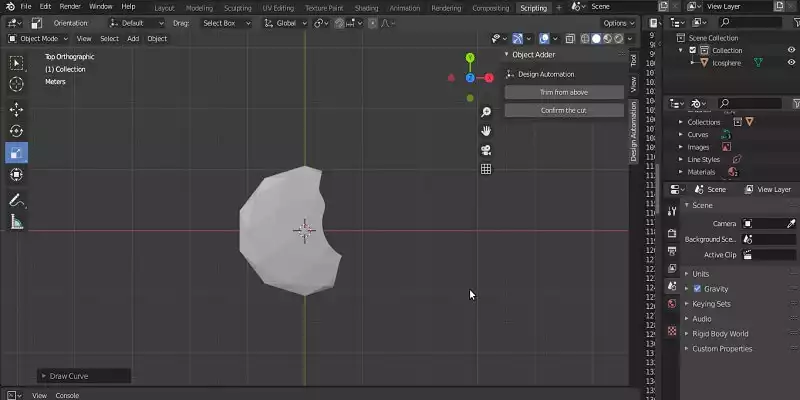
Now, let’s run the code and test our tool. After you have successfully run the code and the panel has appeared, you can click the Trim from the above button and choose the pencil tool from the left-hand side of the page where we have a toolbar and then draw the pattern from the top view. You can set the view from the top by clicking on the z-axis (blue circle). After you have drawn the pattern, it is time to apply the pattern for trimming. To do so, click on the Confirm the Cut button. Let’s follow the instruction with the photos:XY plane).Confirm the Cut, enter the name of the shape that is going to be trimmed, and then click OK.Final Thought
In this tutorial, we have managed to show you a way to create a tool using which you can make your own custom cut on the shape from above. However, you can develop this tool in a way that it can cut from all angles.Download this Article in PDF format

Care to Know Us More?
In Arashtad, we have gathered a professional team of developers who are working in fields such as 3D websites, 3D games, metaverses, and other types of WebGL and 3D applications.

