How to Use Multiple Cameras in Three JS
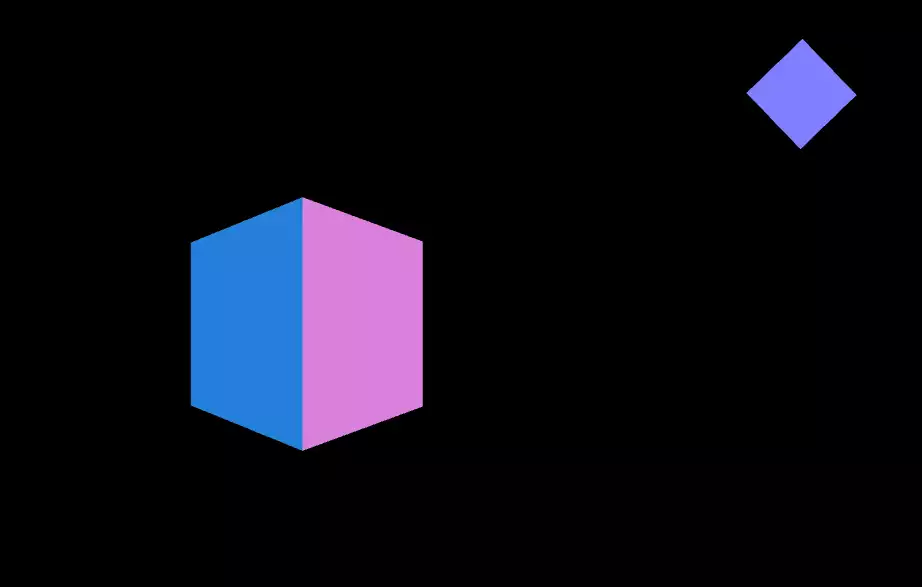
In this tutorial, we will cover one of the less available projects in Three.js on the internet. And that is creating multi-camera scenes. Up to now, nearly all the projects in Three.js that we have seen have the object and scene using only one camera and the viewer was only able to see a certain animation from one view port. But, now using the method we will use in this article, we will be able to cover two or more aspects of the scene. This is wonderful! Because there are some games or animations that need more than view of the scene, and if we can see how to create multiple cameras, we can bring this wonderful feature in our projects and make it more fascinating. The scene we are going to see, is very simple. We will animate a rotating cube and our main camera will cover the moving sides of the cube and the other one will cover the top view of the rotating cube. The top camera will be shown on the top right corner of the browser page, while the main camera will cover the whole page.
Setting up the project:
We will get started with the main elements of a Three js scene, including the camera, the renderer, the scene, and the object. Before doing that, we use the Vite plugin to easily create all the folders and files you need to run the Three.js code. First off, create a folder in the directory of your projects by using the following commands:
mkdir MultiCamera
cd MultiCamera
Then, inside of the your project folder, create the necessary files and folders by
simply running the Vite plugin command:
npm create vite@latest
Then enter the name of the project. You can write the name of your project as the
name. And also the package (the name is arbitrary, and you can choose anything
you want). Then select vanilla as the framework and variant. After that, enter the
following commands in the terminal. Notice that here MultiCamera is the project
folder’s name, and thus, we have changed the directory to MultiCamera. The
name depends on the name you enter in the Vite plugin :
cd MultiCamera
npm install
Afterward, you can enter the JavaScript code you want to write in the main.js file. So,
we will enter the base or template code for running every project with an animating
object, such as a sphere. Also, do not forget to install the Three.js package library
every time you create a project:
npm install three
The code:
Now, enter the following script in the main.js file:
import * as THREE from 'three';
import { Mesh } from 'three';
const scene = new THREE.Scene();
const renderer = new THREE.WebGLRenderer({
     antialias : true
});
//main camera
let camera = new THREE.PerspectiveCamera(
     90,
     window.innerWidth / window.innerHeight,
     0.01,
     500
);
camera.position.set = (0, 0, 0);
camera.lookAt(0, 0, 0);
//Top camera
let Topcamera = new THREE.PerspectiveCamera(
     70,
     (window.innerWidth / 4)/(window.innerHeight / 4),
     0.01,
     500
);
Topcamera.position.set = (0, 0, 0);
Topcamera.lookAt(0, 0, 0);
camera.add(Topcamera);
scene.add(camera);

renderer.setSize(innerWidth, innerHeight);
document.body.appendChild(renderer.domElement);
//creating a cube
const geometry = new THREE.BoxGeometry(5,5,5)
const material = new THREE.MeshNormalMaterial()
const cube = new THREE.Mesh(geometry, material)
scene.add(cube)
//Light source
const width = 20;
const height = 20;
const intensity = 2.5;
const rectLight = new THREE.RectAreaLight(0xffffff, intensity,
width, height);
rectLight.position.set( 5, 5, 5 );
rectLight.lookAt( 0.5, 0.5, 0.5 );
scene.add( rectLight );
var insetWidth;
var insetHeight;
function resize (){
     camera.aspect = window.innerWidth / window.innerHeight;
     camera.updateProjectionMatrix();
     renderer.setSize(window.innerWidth, window.innerHeight);
     insetWidth = window.innerWidth / 4;
     insetHeight = window.innerHeight / 4;
     Topcamera.aspect = insetWidth / insetHeight;
     Topcamera.updateProjectionMatrix();
}
window.addEventListener("resize", resize);
function animate(){
     requestAnimationFrame(animate);
     cube.rotation.y += 0.02;

     camera.position.x = cube.position.x;
     camera.position.z = cube.position.z + 10;
     Topcamera.position.x = cube.position.x;
     Topcamera.position.y = cube.position.y + 10;
     Topcamera.position.z = cube.position.z - 10;
     Topcamera.rotation.x = -Math.PI/2;
     renderer.setViewport(0, 0, window.innerWidth,
     window.innerHeight);
     renderer.render(scene, camera);
     renderer.clearDepth();
     renderer.setScissorTest(true);
     renderer.setScissor(
          window.innerWidth - insetWidth -16,
          window.innerHeight - insetHeight - 16,
          insetWidth,
          insetHeight
     );
     renderer.setViewport(
          window.innerWidth - insetWidth -16,
          window.innerHeight - insetHeight - 16,
          insetWidth,
          insetHeight
     );
     renderer.render(scene, Topcamera);
     renderer.setScissorTest(false);
}
resize();
animate();
Now if we save the code, and enter the following command in the terminal:
npm run dev
We should see the following result:

