How to Deploy A Smart Contract Using Python Web3 Tools: A Full Coverage
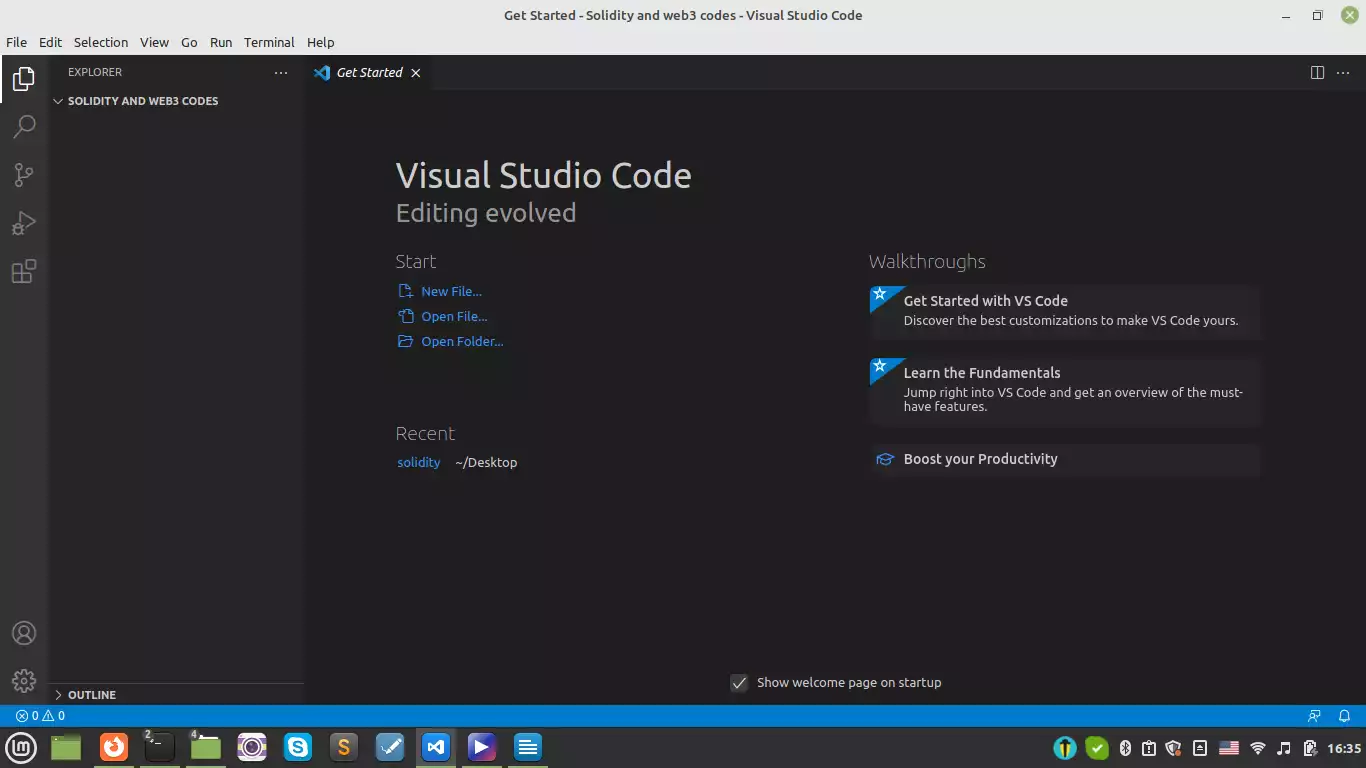
In this tutorial, we are going to see how we can interact with smart contracts using Solidity outside of the Remix IDE. To do this, we should somehow do the process of executing transactions and deploying the contracts with a programming language and a module. Web3 modules provide means for serving our purpose through JavaScript or python. We are going to deploy a smart contract using Python web3 tools and use VS code as our IDE.
Essentials for Using Python Web3 Tools
This series of tutorials is the continuation of the Solidity tutorials in Remix IDE. However, we use VS Code or sublime text instead of Remix IDE. So, it is highly recommended that you read those articles before you begin this series of tutorials. It is also useful if you read the getting started with DAPPs tutorials as well to be more familiar with how to install Web3 Python on your operating system and some web3.py hands-on sample codes. So, let’s get started with more exciting steps into developing a decentralized web application.
Installing VS Code
If you are going to install VS Code on Linux, you are on the same page as me and you can follow along with this installation guide. Otherwise, don’t worry! Because there is nothing fancy about installing VSCode on other operating systems. On Linux, download the file from this link and after it has been downloaded, open the terminal in the download directory. Then, enter this command:
sudo apt installWait for a few minutes and it should get installed. Now, you can open the VS Code and create a folder for our new project.
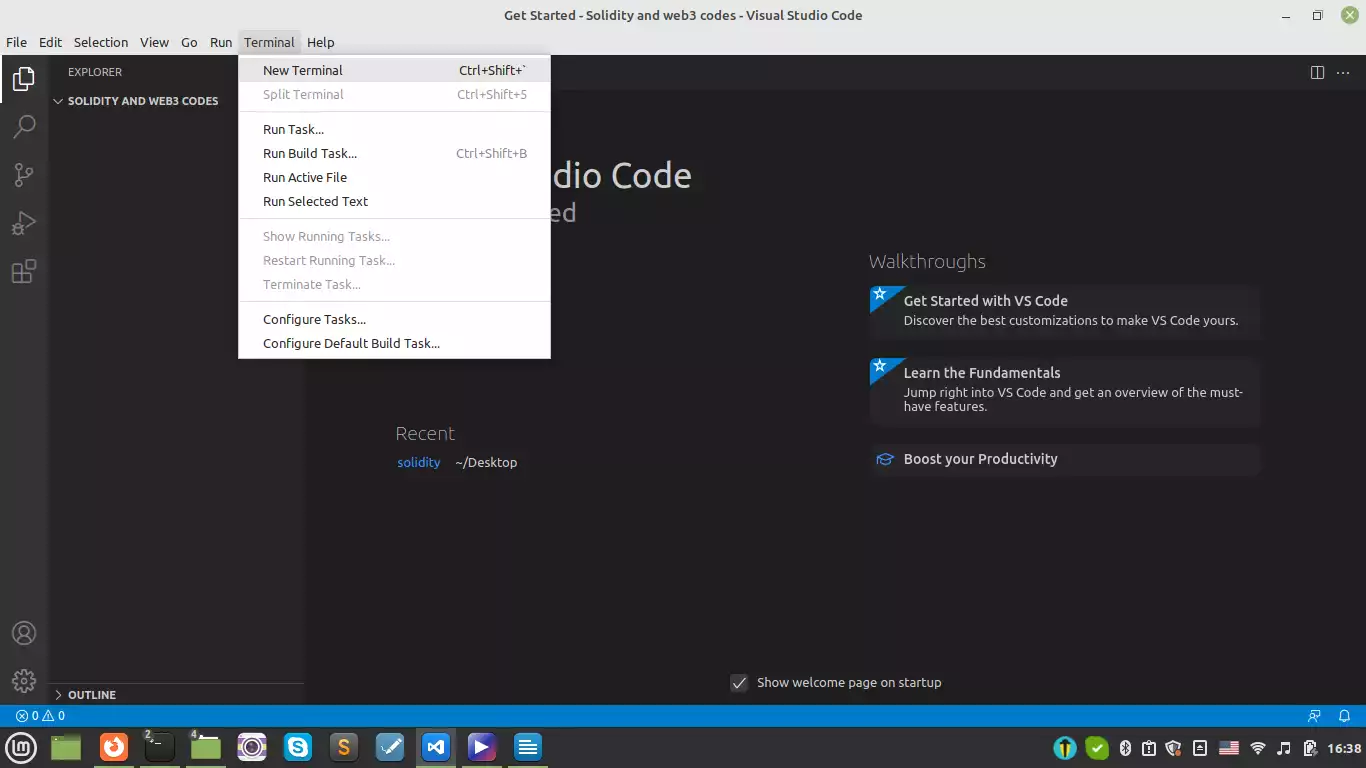
VS Code has a built-in terminal using which we can run our codes a lot easier and faster. So, to open one, click on the terminal and then click on the new terminal.
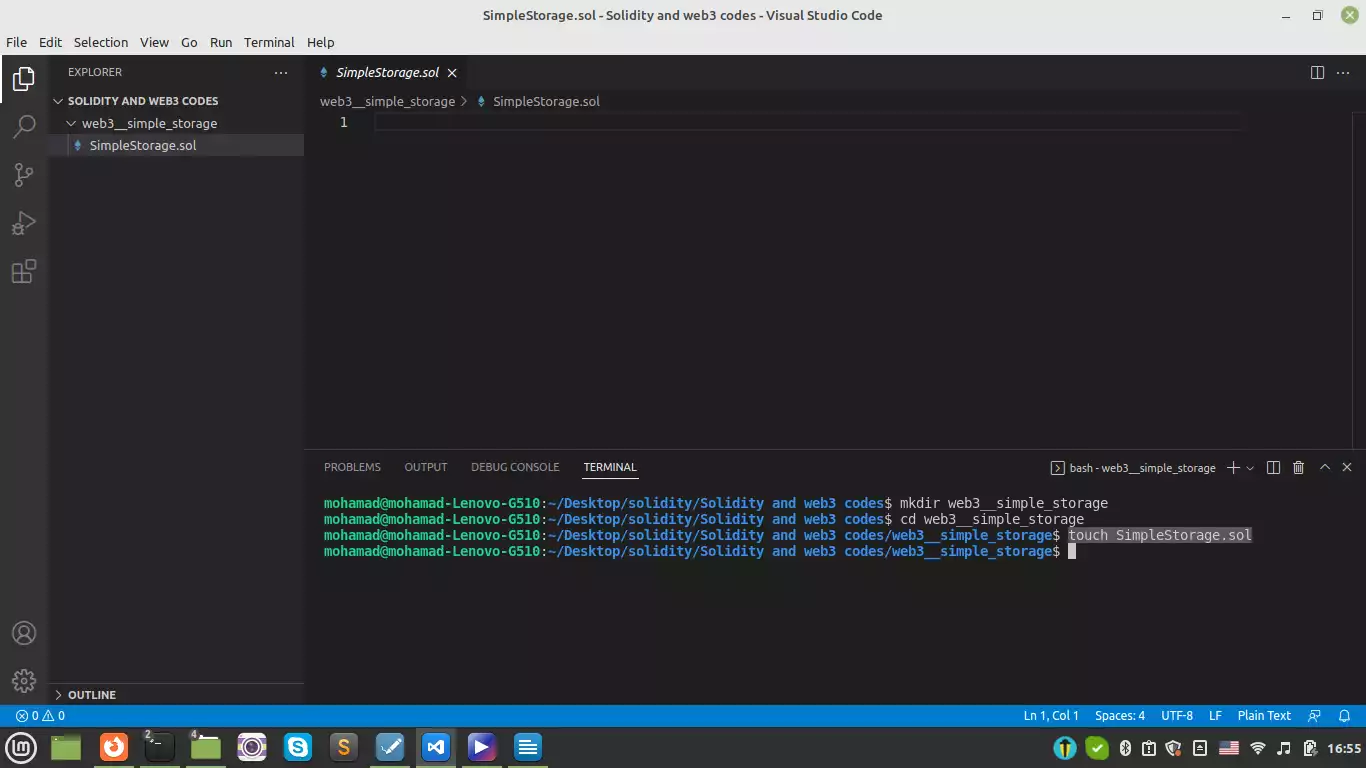
So, you can see that a terminal opens. We create a folder inside to write a simple storage code again this time with VS Code:
mkdir web3_simple_storage
And we get into the folder by typing:
cd web3_simple_storage
And then, we create a file named SimpleStorage.sol using:
touch SimpleStorage.sol
After opening the created file, we can copy the simple storage code that we wrote in the “Smart contracts using Solidity tutorial” and run it.
/ SPDX-License-Identifier: MIT

pragma solidity >= 0.6.0 < 0.9.0;

contract SimpleStorage {
    uint256 Salary;

    // This is a comment!
    struct Employees {
        uint256 Salary;
        string name;
    }

    Employees[] public Employees;
    mapping(string => uint256) public nameToSalary;

    function store(uint256 _Salary) public {
        Salary = _Salary;
    }

    function retrieve() public view returns (uint256) {
        return Salary;
    }

    function addEmployees(string memory _name, uint256 _Salary) public {
        Employees.push(Employees(_Salary, _name));
        nameToSalary[_name] = _Salary;
    }
}
Notice that VS Code must have Solidity pre-installed but if you are coding with other text editors, you can head over to this link for installation guide on your operating system.
Writing the Python Scripts
Now in order to deploy the above contract, we create a python file called deploy.py. We can do this by typing:
touch deploy.py
And in this file, we write:
with open("./SimpleStorage.sol","r") as file:
	simple_storage_file = file.read()
Now, in order to compile our Solidity code, we need to install a package called “py-solc-x”. To do that, write this in your terminal:
pip install py-solc-x
Once we installed the package, we import it into our python file like this:
from solcx import compile_standard
And, here is the rest of the python code:
import json

with open("./SimpleStorage.sol","r") as file:
	simple_storage_file = file.read()

compiled_sol = compile_standard ({
	               "language":"solidity",
	               "sources": {"SimpleStorage.sol":{"content": simple_storage_file}},
	               "setting": {
	                        "outputSelection":{
				        "*": {"*": ["abi","metadata","evm.bytecode","evm.sourceMap"]}
			        }
	               },
	       },solc_version="0.6.0",)

with open("compiled_code.json","w") as file:
	json.dump(compiled_sol,file)
Notice that we should also check the version of our Solidity when it is installed and also check in our .sol file. Now, in our console, if we write:
python3 deploy.py
We will see that a json file is created in the file directory leading us to some key data. The data is about the contract that we have just written such as Byte Code, ABI (which stands for abstract binary interface), the address of the contract, and so on.
In order to get out a little of this important data, we write the following scripts:
byte_code = compiled_sol["contracts"]["SimpleStorage.sol"]["SimpleStorage"]["evm"]["bytecode"]["object"]

abi = compiled_sol["contracts"]["SimpleStorage.sol"]["SimpleStorage"]["evm"][“abi”]
Now, if we print the abi and byte_code, we will see some large output. These key data will later be used to run our smart contract.
Using Python Web3 tools alongside Ganache as A Simulated Blockchain
Now, we are going to use Ganache as a simulated blockchain to deploy our smart contract simple storage on it. We also continue using our python web3 tools to deploy the smart contract on Ganache IDE simulated blockchain. Furthermore, we have provided some guides throughout the article for installing web3.py module.
Managing the scripts
Previously, we learned how to retrieve the bytecode and the ABI of the SimpleSorage.sol contract. Now, we’ve brought the codes with some editions to make it work more perfectly.
// SPDX-License-Identifier: MIT

pragma solidity >= 0.6.0 < 0.9.0;

contract SimpleStorage {

    uint256 Salary;
    // This is a comment!
    struct Employees {
        uint256 Salary;
        string name;
    }

    Employees[] public employee;
    mapping(string => uint256) public nameToSalary;

    function store(uint256 _Salary) public {
        Salary = _Salary;
    }

    function retrieve() public view returns (uint256){
        return Salary;
    }

    function addPerson(string memory _name, uint256 _Salary) public {
        employee.push(Employees(_Salary, _name));
        nameToSalary[_name] = _Salary;
    }
}
And the deploy.py script goes like this:
import json
from web3 import Web3
from solcx import compile_standard, install_solc
import os
from dotenv import load_dotenv

load_dotenv()

with open("./SimpleStorage.sol", "r") as file:
	simple_storage_file = file.read()

install_solc("0.6.0")
print("installed")

compiled_sol = compile_standard({
			"language": "Solidity",
			"sources": {"SimpleStorage.sol": {"content": simple_storage_file}},
			"settings": {
				"outputSelection": {
						"*": {
							"*": ["abi", "metadata", "evm.bytecode",
								"evm.bytecode.sourceMap"]
						}
				}
			},
		},solc_version="0.6.0",)

with open("compiled_code.json", "w") as file:
	json.dump(compiled_sol, file)

bytecode = compiled_sol["contracts"]["SimpleStorage.sol"]["SimpleStorage"]["evm"]["bytecode"]["object"]

abi = json.loads( compiled_sol["contracts"]["SimpleStorage.sol"]["SimpleStorage"]["metadata"])["output"]
	["abi"]
Notice that you should also install “dotenv package” using the following command in the terminal:
pip install python-dotenv
Bytecode and ABI:
Now if you print and bytecode:
print(abi)
Result:
[{'inputs': [{'internalType': 'string', 'name': '_name', 'type': 'string'}, {'internalType': 'uint256', 'name': '_Salary', 'type': 'uint256'}], 'name': 'addPerson', 'outputs': [], 'stateMutability': 'nonpayable', 'type': 'function'}, {'inputs': [{'internalType': 'uint256', 'name': '', 'type': 'uint256'}], 'name': 'employee', 'outputs': [{'internalType': 'uint256', 'name': 'Salary', 'type': 'uint256'}, {'internalType': 'string', 'name': 'name', 'type': 'string'}], 'stateMutability': 'view', 'type': 'function'}, {'inputs': [{'internalType': 'string', 'name': '', 'type': 'string'}], 'name': 'nameToSalary', 'outputs': [{'internalType': 'uint256', 'name': '', 'type': 'uint256'}], 'stateMutability': 'view', 'type': 'function'}, {'inputs': [], 'name': 'retrieve', 'outputs': [{'internalType': 'uint256', 'name': '', 'type': 'uint256'}], 'stateMutability': 'view', 'type': 'function'}, {'inputs': [{'internalType': 'uint256', 'name': '_Salary', 'type': 'uint256'}], 'name': 'store', 'outputs': [], 'stateMutability': 'nonpayable', 'type': 'function'}]
print(bytecode)
Result:
608060…long number… 6000033
Besides, once you run the python script, you will see that a json file is created in the directory as the result of json.dump (compiled_sol, file) line.
Deploying the Smart Contract Using Python on Ganache
So, let’s deploy our smart contract using Python web3 tools on a blockchain. For our first experiences and for learning purposes, we use Ganache (remember we used JavaScript VM and injected web3 as our test networks in remix IDE).
Ganache is a simulated blockchain designed for test and learning purposes and helps us develop our local blockchain. It is also worth mentioning that it is not connected to any other blockchains out there. However, it acts just the same as real-world one.
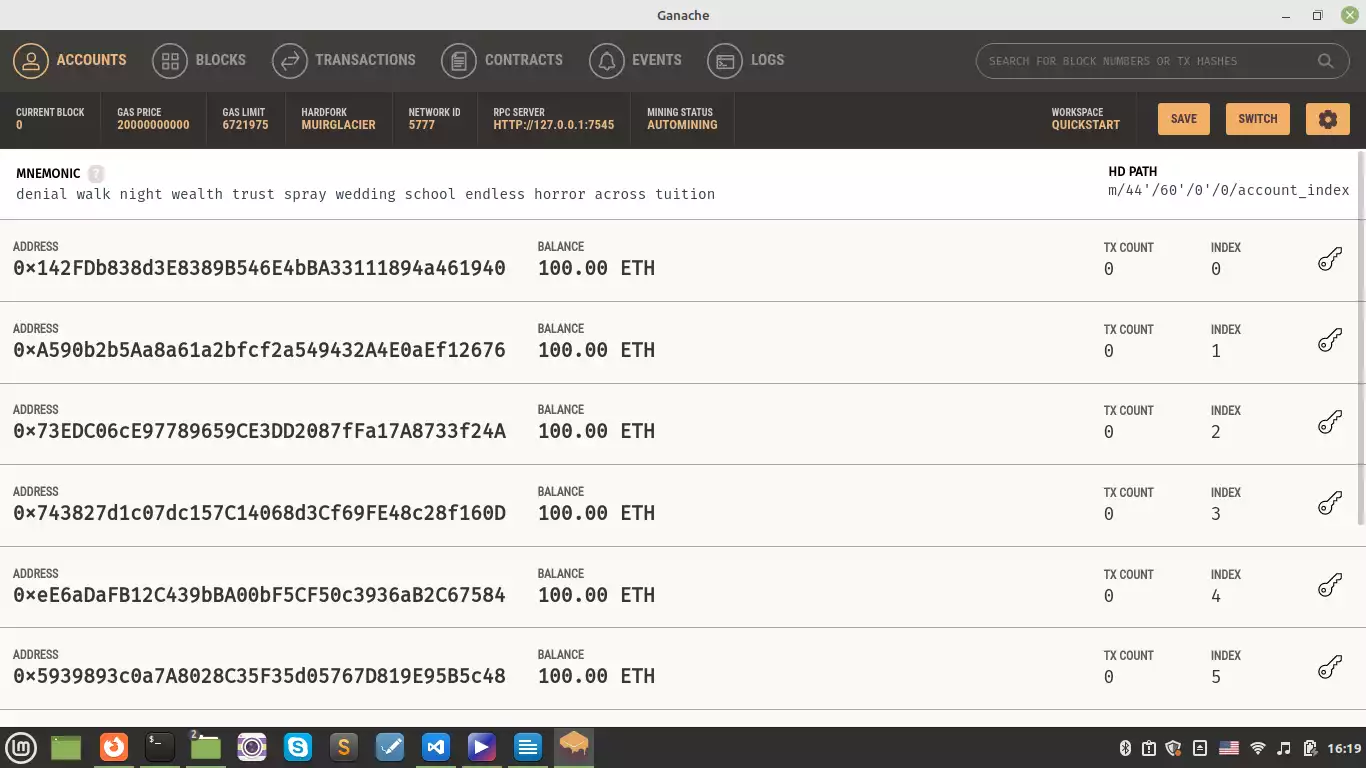
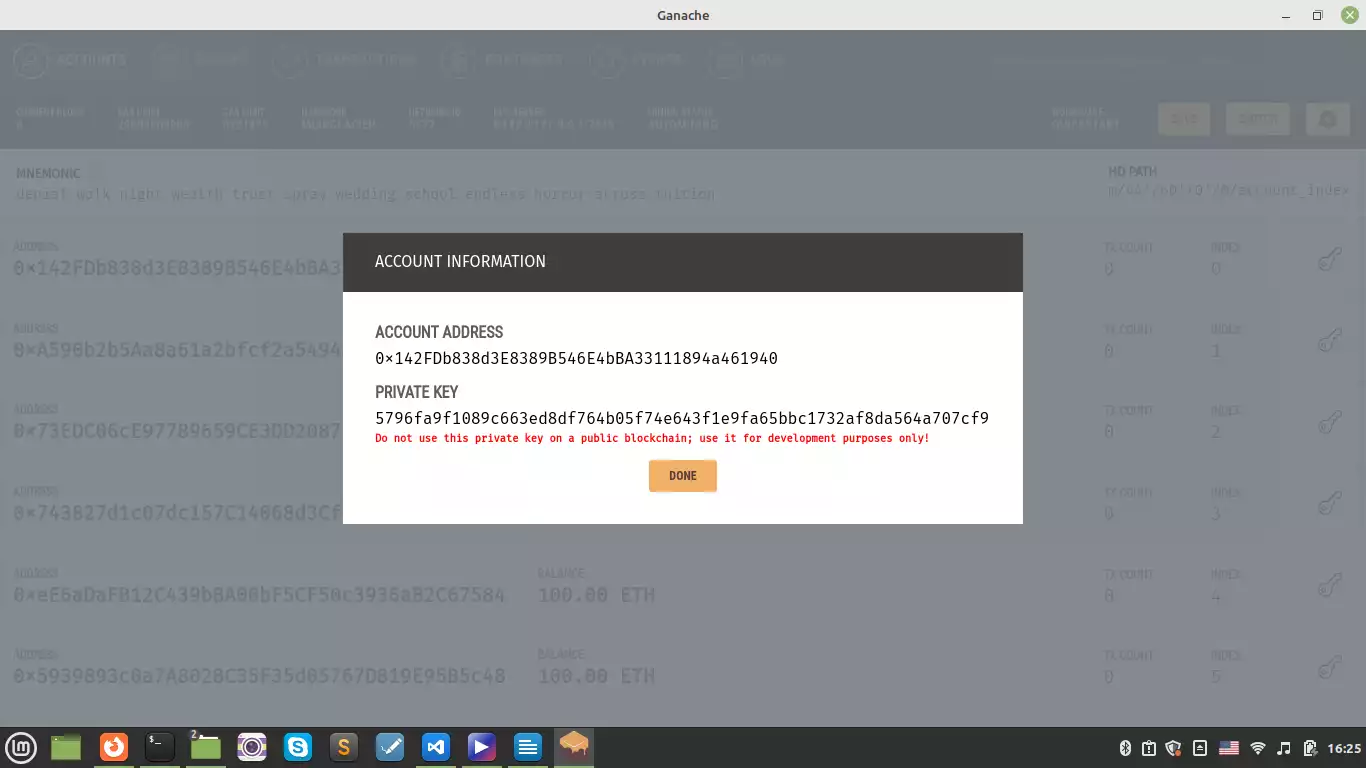
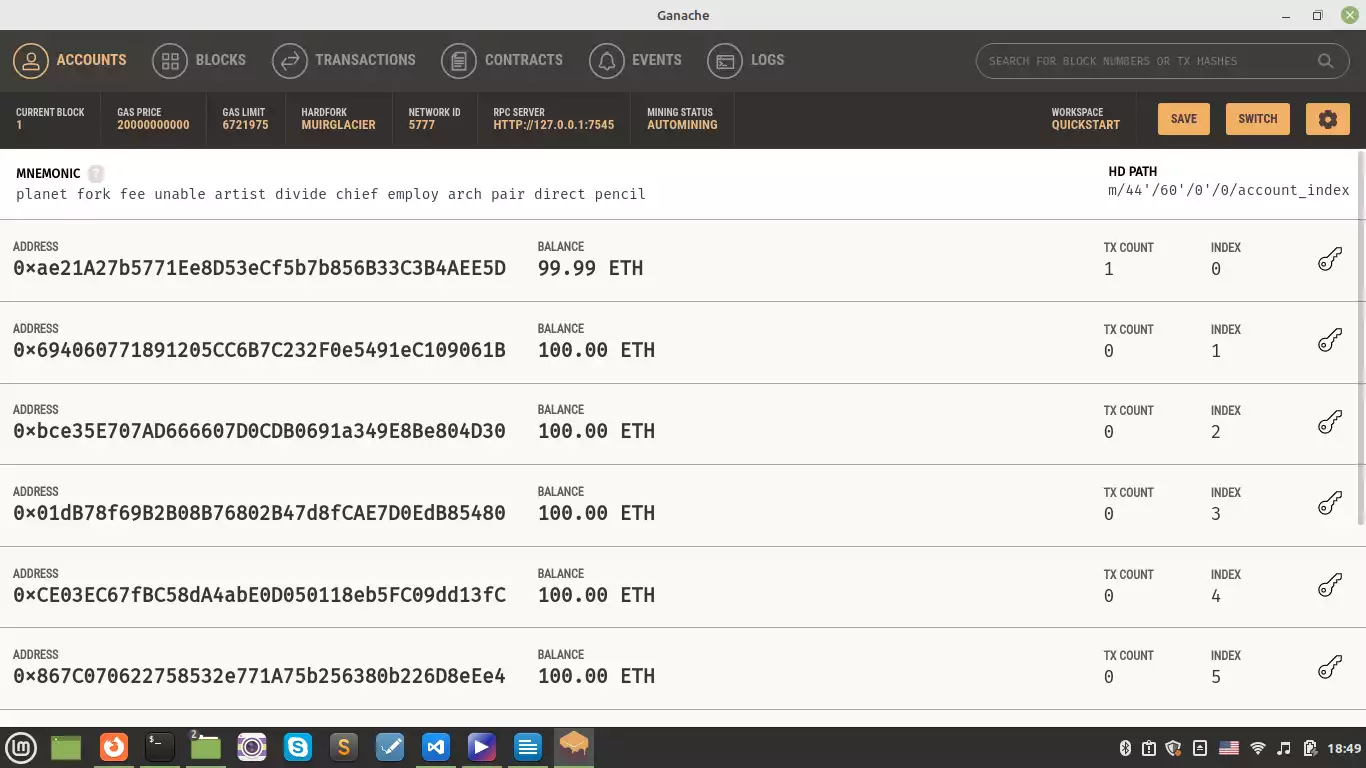
Once you install and open Ganache, you will be able to see that you are given 10 accounts with their own addresses and private keys on them. (To see the private key, just click on the key sign on the right side of every account)
And if you look at the top of the Ganache IDE, you will be able to see the RPC server address and NetworkID. Both of them are necessary for us to connect to the blockchain.
Installing web3
Now, the next step to connect to the blockchain using python is to install web3.py. If you haven’t read the getting started with Dapps tutorials, you can follow along with these guides to be able to install it on your operating system. However, These guidelines only show you how to install it on Linux. For Windows, you might need to install some Visual Studio C dependencies that are mentioned in the raised Error in the command prompt after you attempt to install it on windows. Now on Linux, on VS Code terminal, write these 3 commands to be able to install the web3 module:
pip install eth-tester web3
pip install eth-tester[py-evm]
pip3 install web3
And now we import the web3 module:
from web3 import Web3
Connecting to Ganache CLI
To connect to the blockchain instead of Metamask, we need an HTTP provider which for Ganache is HTTP://127.0.0.1:7545 right under the RPC server. We also need the chain id which we copy from the network id on top of the Ganache user interface and the address in addition to its private key is also required:
web3 = Web3(Web3.HTTPProvider("HTTP://127.0.0.1:7545"))
chain_id = 1337

address = "0xae21A27b5771Ee8D53eCf5b7b856B33C3B4AEE5D"
private_key =  "0x9cf74fb71811e4f360df39e3c13790d8fde312d353b8972937c8f596d052de45"
Ready for Deploying the Smart Contract
After defining the provider and an account, it is time to define our contract using the ABI and the Bytecode of the SimpleStorage:
SimpleStorage = web3.eth.contract(abi = abi, bytecode = bytecode)
What’s A Nonce?
Then, we need a nonce. A nonce is the abbreviation of a “number used only once”. Besides, it’s a number that is added to an encrypted (hashed) block in a blockchain that when it is rehashed, meets certain difficulty levels. The nonce is the number that miners are solving for. Here to get a nonce from our address or in other words to get the latest transaction of our address, we write:
nonce = web3.eth.getTransactionCount(address)
And if you print this variable, the terminal returns 0 as we have had no transaction. Having defined all the above variables, we can now submit the transaction that deploys the contract:
transaction = SimpleStorage.constructor().buildTransaction({
			"chainId": chain_id,
			"gasPrice": web3.eth.gas_price,
			"from": address,
			"nonce": nonce,
	       }
)
Then we sign the transaction by writing:
signed_txn = web3.eth.account.sign_transaction(transaction,
    private_key=private_key)
It is now the time to finally deploy our contract. As it might take some time when we work with real blockchain test nets and providers like Infura, we print the level we are in, to be able to track the process at the time of running the code:
print("Deploying Contract…")
So, our raw transaction is the one we deploy using the signed transaction:
tx_hash = web3.eth.send_raw_transaction(signed_txn.rawTransaction)
After the transaction is confirmed, we can say that it is finally mined and our contract is deployed to the blockchain:
print("Waiting for transaction to finish...")

tx_receipt = web3.eth.wait_for_transaction_receipt(tx_hash)

print(f"Done! Contract deployed to {tx_receipt.contractAddress}")
And if we run the code by typing:
python3 deploy.py
In the terminal, we will see a result like this:
Deploying Contract...
Waiting for transaction to finish...
Done! Contract deployed to 0x88A33c204C622683Dc2b0aaD78d51B86a9b35CAB
Which approves the contract has been successfully deployed. Congratulations!
After Deployment Notes
Now if we go to Ganache and check the balance of the first account that we copied its address and private key, we will see that it is 99.99 which means that some of its balance has been used for the gas fee.
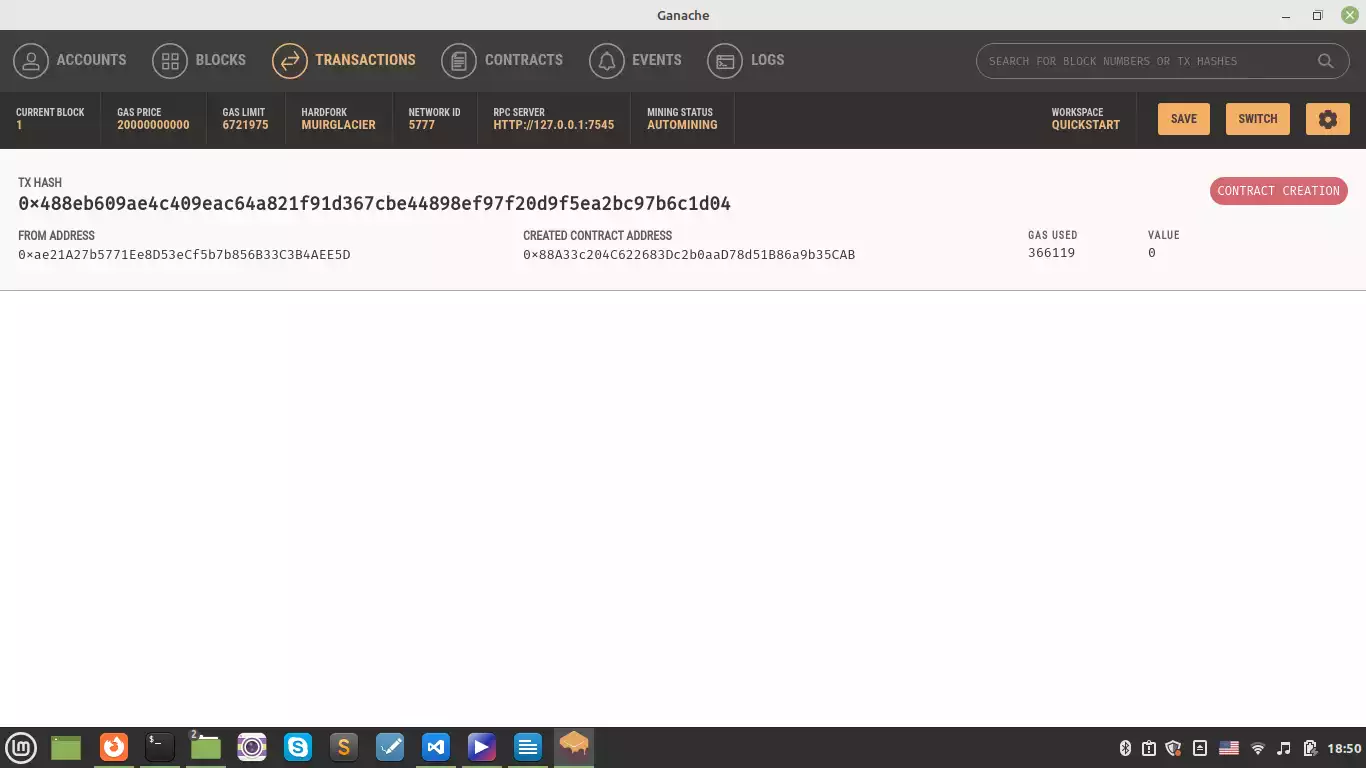
And if we head over to transactions tab on the top, we will be able to see our transaction is recorded there.
How to Guard Our Private Key in A Smart Contract Using Python Web3 Tools
In this section, we are going to see how we can avoid pasting our private key inside our script file and save it somewhere inaccessible to others. This may happen because we may share our scripts on GitHub. The first thing that we should do here is to export the private key in our console:
export PRIVATE_KEY=0x9cf74fb71811e4f360df39e3c13790d8fde312d353b8972937c8f596d052de45
And inside the script instead of pasting the private key itself, we write:
private_key = os.getenv("PRIVATE_KEY")
And now this way the private key saves just the same private key as we had pasted in front of it. But notice that this method only works on Linux and Mac OS, but not on Windows. However, there are ways to cover this on Windows. There is also another way to save the private key somewhere safe and that is creating a .env file in your directory. To do so, first, make sure you have dotenv python module installed on your os the way we did in the last section of our tutorial and load it. In summary, make sure you add the following scripts in deploy.py file:
export PRIVATE_KEY=0x9cf74fb71811e4f360df39e3c13790d8fde312d353b8972937c8f596d052de45
And also for private key keep the private_key = os.getenv(“PRIVATE_KEY”) where it is. And in the .env file, write:
export PRIVATE_KEY=0x9cf74fb71811e4f360df39e3c13790d8fde312d353b8972937c8f596d052de45
Also to avoid publicizing it on GitHub create a .gitignore file and in it, write:
.env
How to Interact with A Smart Contract Using Python Web3
Now that we have deployed the SimpleStorage.sol contract to the simulated blockchain on Ganache, it’s time to interact with it. Suppose we want to store a number like 38 and then be able to retrieve it as well, we write:
simple_storage = web3.eth.contract(address=tx_receipt.contractAddress, abi=abi)

print(f"Initial Stored Value {simple_storage.functions.retrieve().call()}")

greeting_transaction = simple_storage.functions.store(38).buildTransaction({
				"chainId": chain_id,
				"gasPrice": web3.eth.gas_price,
				"from": address,
				"nonce": nonce + 1,
			})

signed_greeting_txn = web3.eth.account.sign_transaction(
greeting_transaction, private_key=private_key)

tx_greeting_hash = web3.eth.send_raw_transaction(signed_greeting_txn.rawTransaction)

print("Updating stored Value…")

tx_receipt = web3.eth.wait_for_transaction_receipt(tx_greeting_hash)

print(simple_storage.functions.retrieve().call())
Notice that for the nonce, we wrote nonce+1 because every time we do something on blockchain the nonce needs to be unique. And also remember that if you call the contract and retrieve a number, there is no need for any transaction and before saving any number to the contract, the result of retrieve will be 0 but after saving the number by creating the transaction on the contract (for storing the number) the answer to retrieve call will be the saved number which is 38. Now let’s see the result on the terminal:
Initial Stored Value 0
Updating stored Value...
38
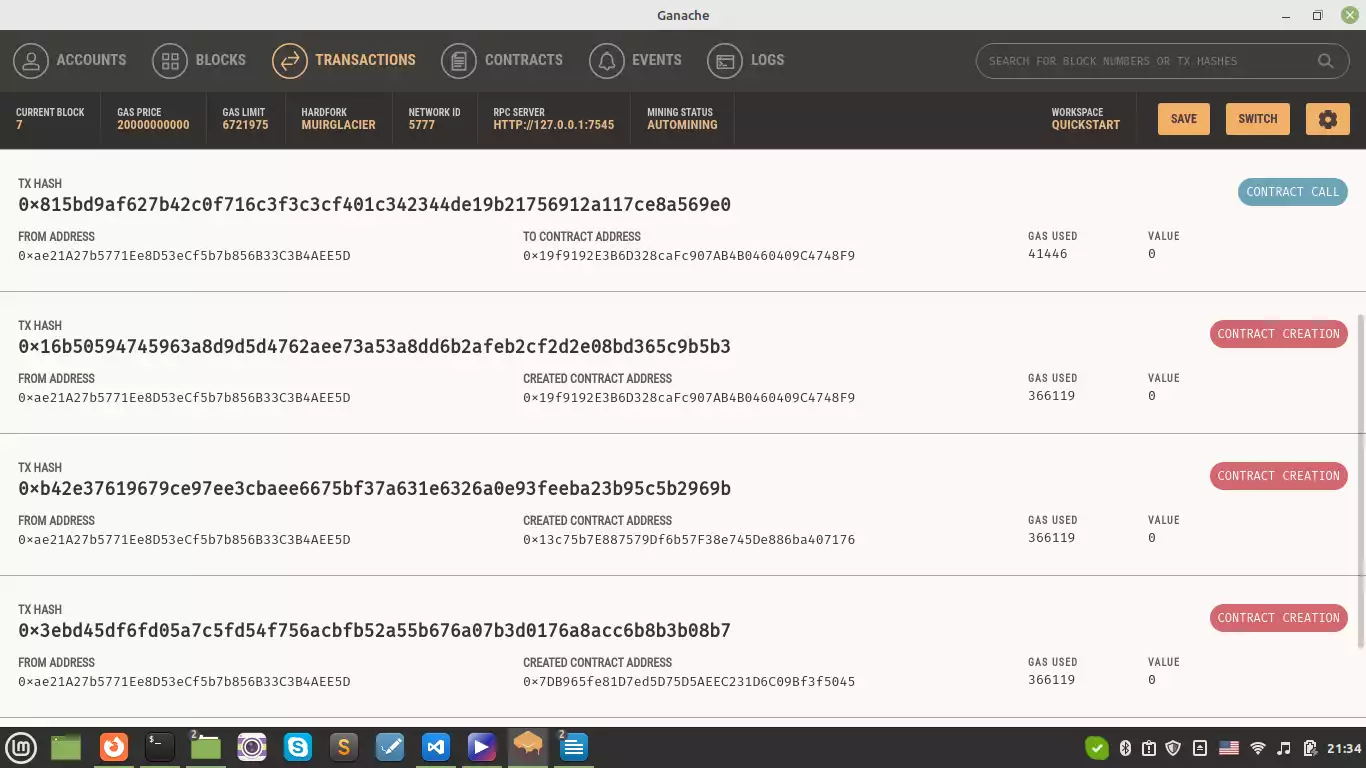
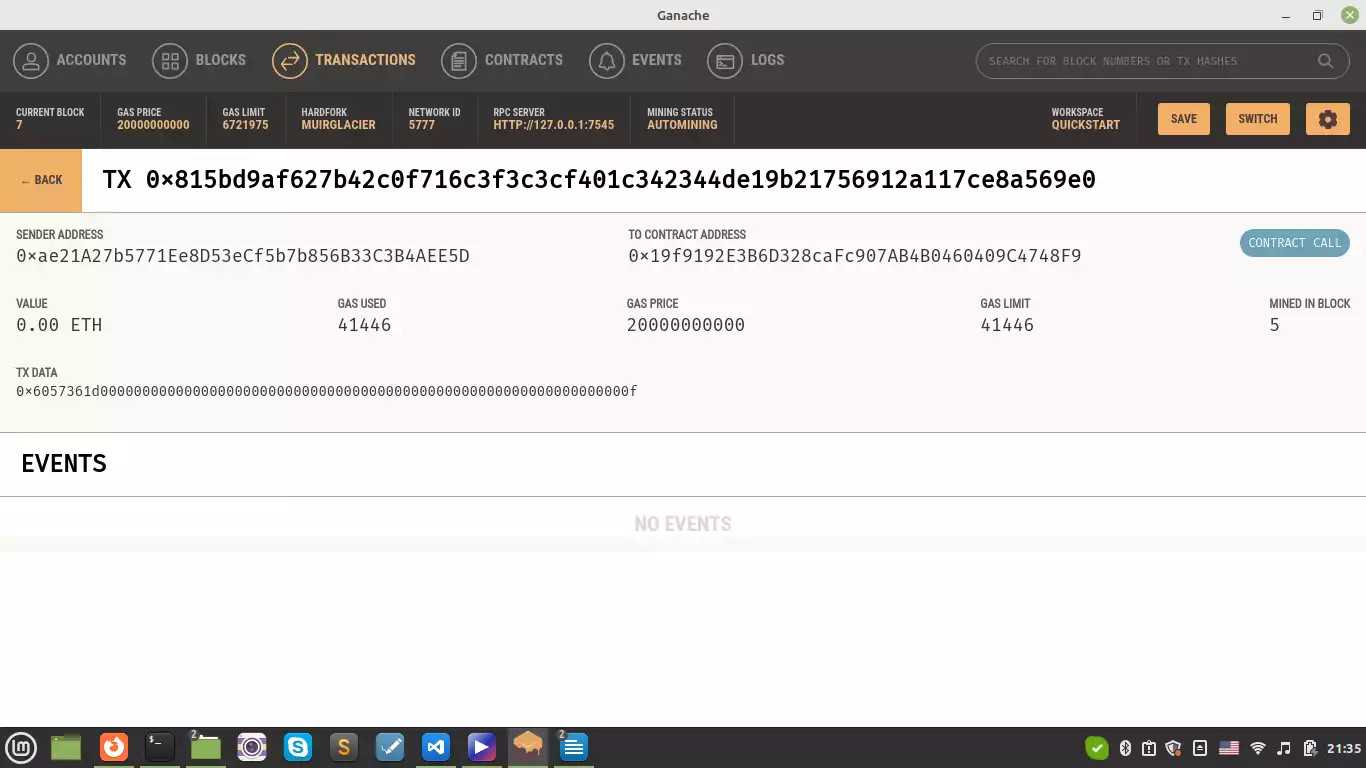
Now if we go to Ganache, to the transactions, we are going to see the contract call with the blue color and the details of the transaction.
And this our complete python code:
import json
from web3 import Web3
from solcx import compile_standard, install_solc
import os
from dotenv import load_dotenv

load_dotenv()

with open("./SimpleStorage.sol", "r") as file:
	simple_storage_file = file.read()

install_solc("0.6.0")
print("installed")

compiled_sol = compile_standard(
{
	"language": "Solidity",
	"sources": {"SimpleStorage.sol": {"content": simple_storage_file}},
			"settings": {
				"outputSelection": {
						"*": {
							"*": ["abi", "metadata", "evm.bytecode",
 								"evm.bytecode.sourceMap"]
						}
				}
			},
	},solc_version="0.6.0",)

with open("compiled_code.json", "w") as file:
	json.dump(compiled_sol, file)

bytecode = compiled_sol["contracts"]["SimpleStorage.sol"]["SimpleStorage"]["evm"]["bytecode"]["object"]

abi = json.loads(compiled_sol["contracts"]["SimpleStorage.sol"]["SimpleStorage"]["metadata"])["output"]
	["abi"]

web3 = Web3(Web3.HTTPProvider("HTTP://127.0.0.1:7545"))
chain_id = 1337

address = "0xae21A27b5771Ee8D53eCf5b7b856B33C3B4AEE5D"

private_key = os.getenv("PRIVATE_KEY")

print(private_key)

SimpleStorage = web3.eth.contract(abi = abi,bytecode = bytecode)

nonce = web3.eth.getTransactionCount(address)

transaction = SimpleStorage.constructor().buildTransaction({
			"chainId": chain_id,
			"gasPrice": web3.eth.gas_price,
			"from": address,
			"nonce": nonce,
	      })

signed_txn = web3.eth.account.sign_transaction(transaction, private_key=private_key)

print("Deploying Contract...")

tx_hash = web3.eth.send_raw_transaction(signed_txn.rawTransaction)

print("Waiting for transaction to finish...")

tx_receipt = web3.eth.wait_for_transaction_receipt(tx_hash)

print(f"Done! Contract deployed to {tx_receipt.contractAddress}")

#interacting with the deployed contract

simple_storage = web3.eth.contract(address=tx_receipt.contractAddress, abi=abi)

print(f"Initial Stored Value {simple_storage.functions.retrieve().call()}")

greeting_transaction = simple_storage.functions.store(38).buildTransaction({
				"chainId": chain_id,
				"gasPrice": web3.eth.gas_price,
				"from": address,
				"nonce": nonce + 1,
			})

signed_greeting_txn = web3.eth.account.sign_transaction(
greeting_transaction, private_key=private_key)

tx_greeting_hash = web3.eth.send_raw_transaction(signed_greeting_txn.rawTransaction)

print("Updating stored Value...")

tx_receipt = web3.eth.wait_for_transaction_receipt(tx_greeting_hash)

print(simple_storage.functions.retrieve().call())
Interacting with Smart Contracts Using Commnad Line Interface (CLI)
Up to now, we have contributed with the Ganache interface. But, what if we want to interact with it using Command Line Interface also known as CLI? To do that, we need to install a couple of things. First, you should install node.js using this link.
You also need to install ganache-cli and there are 2 ways to so do that.
-
1. Installing yarn
npm install –global yarn
And then:
yarn global add ganache-cli
And
-
2. Installing through npm command:
yarn global add ganache-cli
You can make sure about the installation by writing:
npm install -g ganache-cli
Once you made sure that it has been installed, you can write in your terminal:
ganache-cli –version
And this is going to show all the data of the Ganache account without the interface being open, including the accounts, private keys, and so on.
You might always need to get the same private keys from the Ganache CLI. So, you can type:
ganache-cli
And this gives you always the same wallet addresses. Also, notice that when you are working with the ganache-cli, you should have another terminal on VS Code to run the deploy.py file and interact with the smart contract so that you can use the first one for ganache-cli.
ganache-cli –deterministic
Last Steps of Interacting with A Smart Contract Using Python Web3: Infura Host Node
Up to now, we have deployed our contracts on different test net blockchains. In Remix IDE, we deployed our contract on injected web3 and JavaScript VM, and on Python, we have used Ganache as a simulated blockchain. Now, let’s deploy our smart contract using Python Web3 tools. If we want to switch to mainnet blockchain and run our contract transactions on it, we have 2 options. The first one is to download all the Ethereum blockchain records using the Geth command from the go Ethereum library. Although this will give you a full node Ethereum blockchain locally, it is going to cost you so much memory, bandwidth, and a full-time running computer only to give you a full node on the Ethereum blockchain. However, this method is useful for some purposes but for our case, we can use another method which is using a host node like Infura.
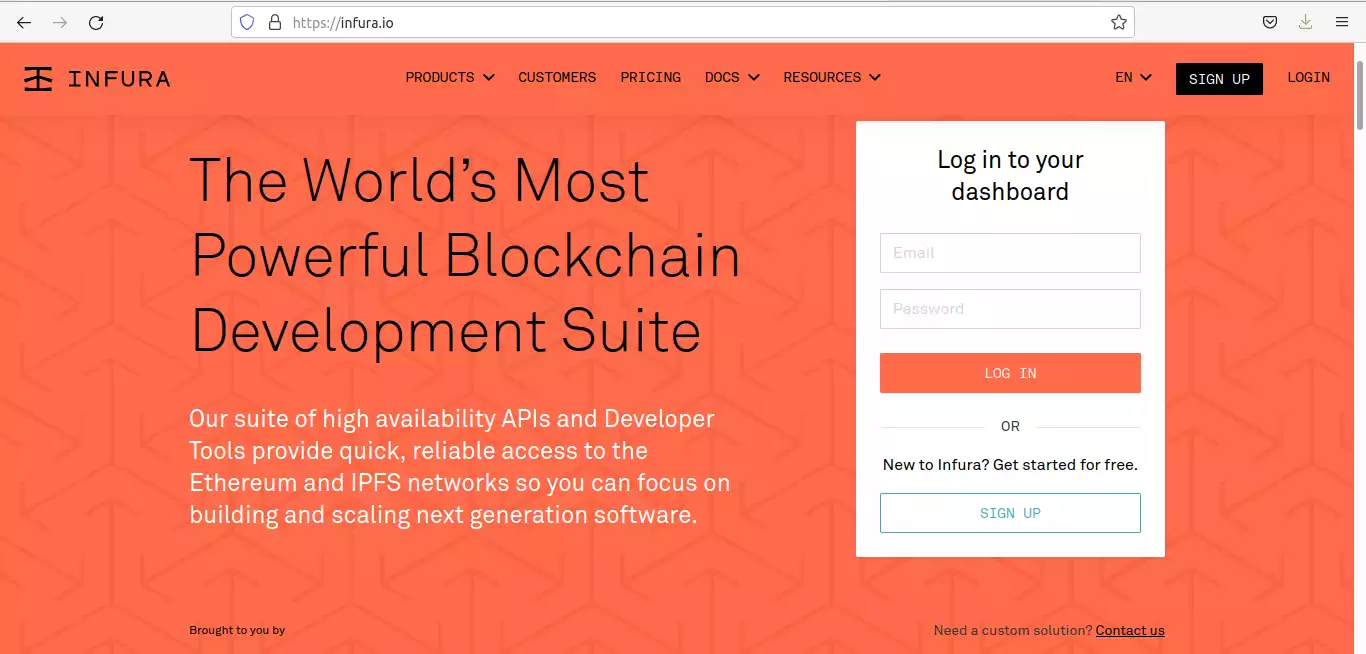
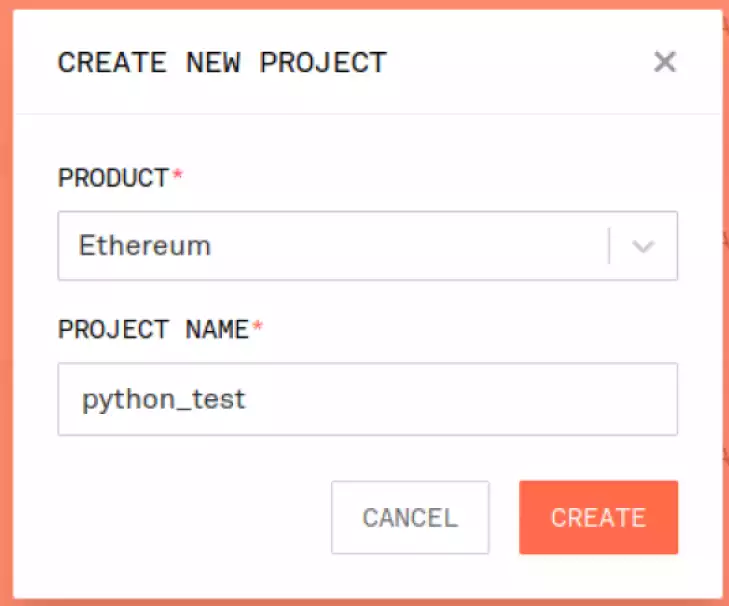
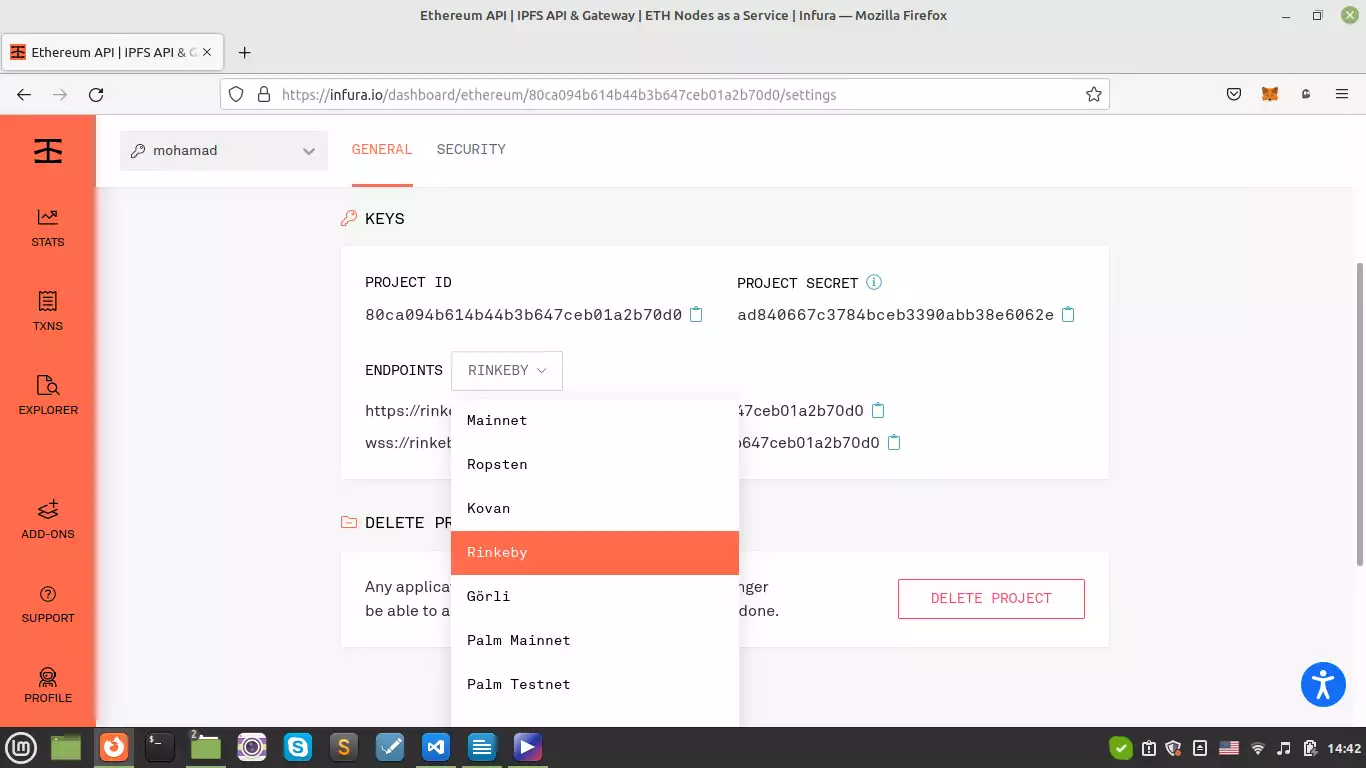
Using Infura:So in order to use Infura, you need to simply sign up or log in (if you have signed up before). Then, after you enter your profile, copy the required endpoint (which could be mainnet or any testnet like Rinkeby, Faucet, Ropsten .etc) from the settings and paste it into the HTTP Provider of your script.
Here, we should use Rinkeby because we do not want to spend real ETH! And as you remember we have received some Rinkeby ETH from its Faucet in our Metamask wallet Rinkeby account. The format of the endpoint is like this:
https://.infura.io/v3/
We can copy this to our code, so instead of:
web3 = Web3(Web3.HTTPProvider("HTTP://127.0.0.1:7545"))
We write:
web3 = Web3(Web3.HTTPProvider("https://.infura.io/v3/ "))
Notice that you should enter the type of your endpoint (which is Rinkeby here) and your special project ID because it varies from one account to another. Also, remember that you shouldn’t share your Infura endpoint URL with anybody so we use the same technique as we used for the private key. On .env file we write:
export Infura_EndPoint = "https://.infura.io/v3/ "
And in the deploy.py file we write:
web3 = Web3(Web3.HTTPProvider(os.getenv("Infura_EndPoint")))
Smart Contract Using Python Web3 Tip: Getting the Chain ID
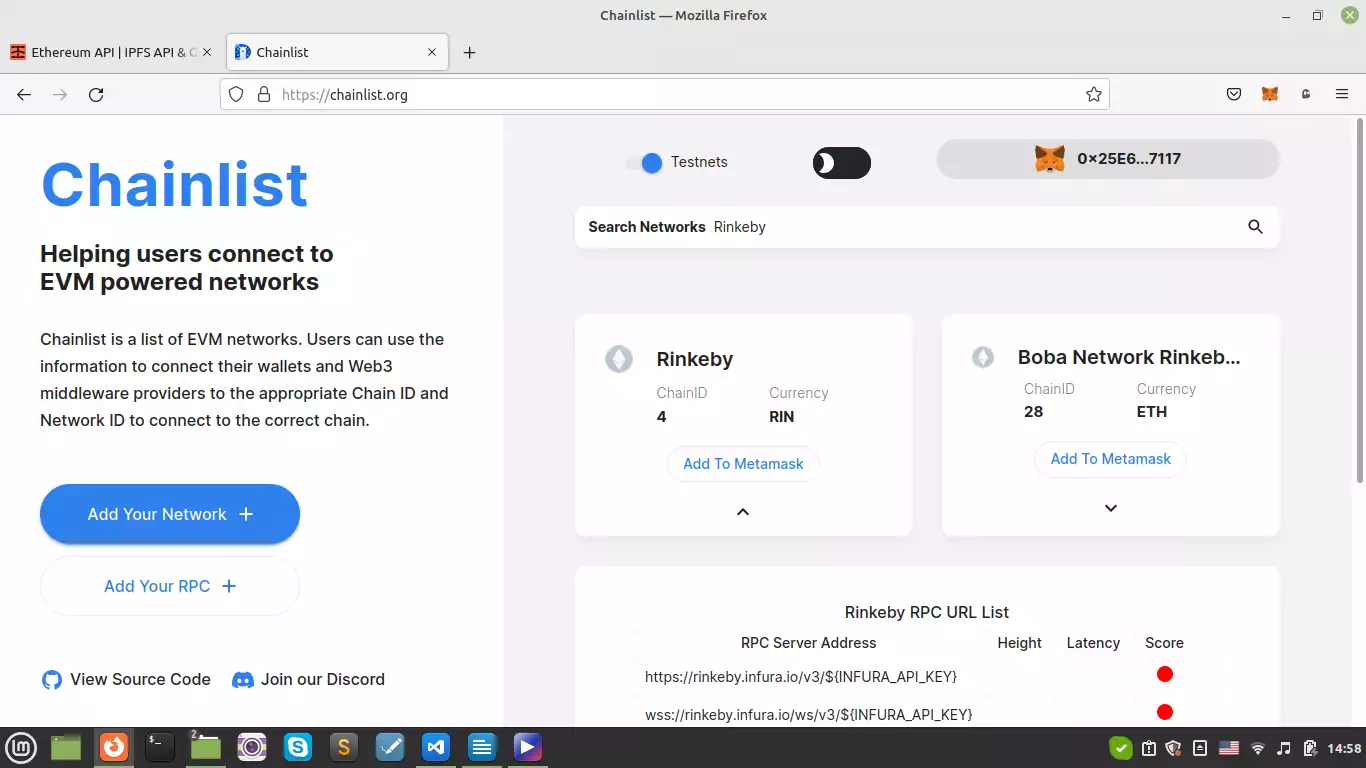
And now we need a chain ID which we can get from this link.
For Rinkeby, the chain id is 4. So, we enter it in our code:
chain_id = 4
Then, we need to copy our Metamask address and private key from our wallet account and paste it into our python file. (private_key on .env file).
And if we run our deploy.py file, the result will be as follows:
installed
Deploying Contract...
Waiting for transaction to finish...
Done! Contract deployed to 0x7F0fc6939B12CE506337294c4c96C2d3F64F9DF6
Initial Stored Value 0
Updating stored Value...
38
As you can see, since we are running our contract on a mainnet, again the process is a lot slower compared to what we saw when we used Ganache.
Rinkeby Etherscan:
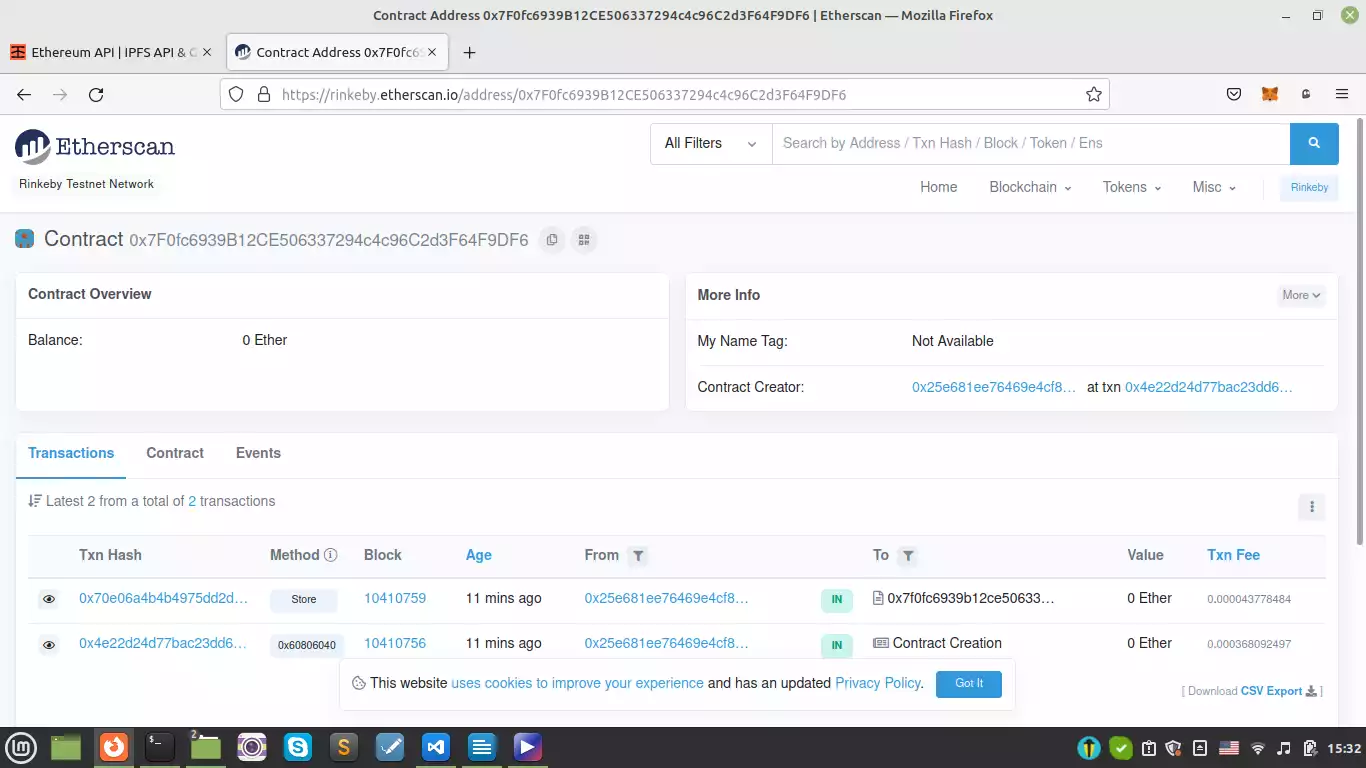
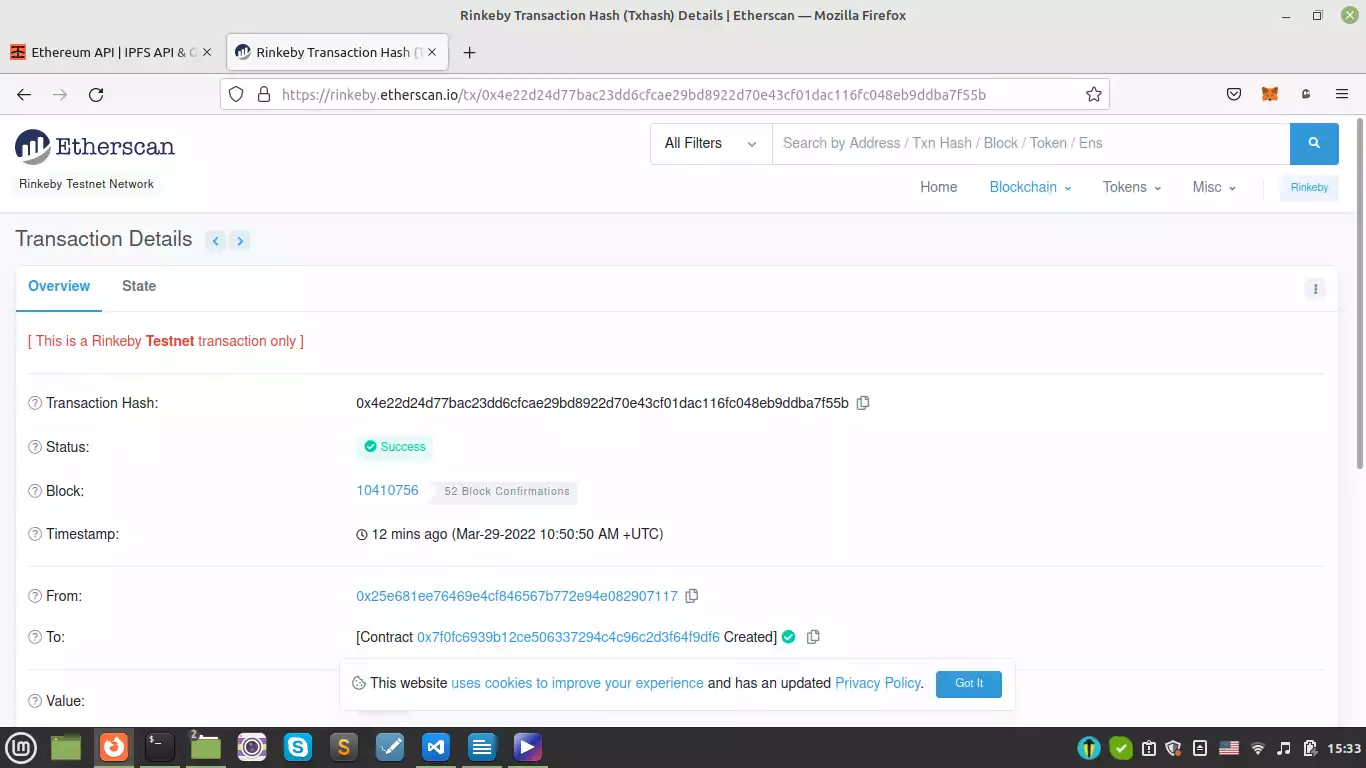
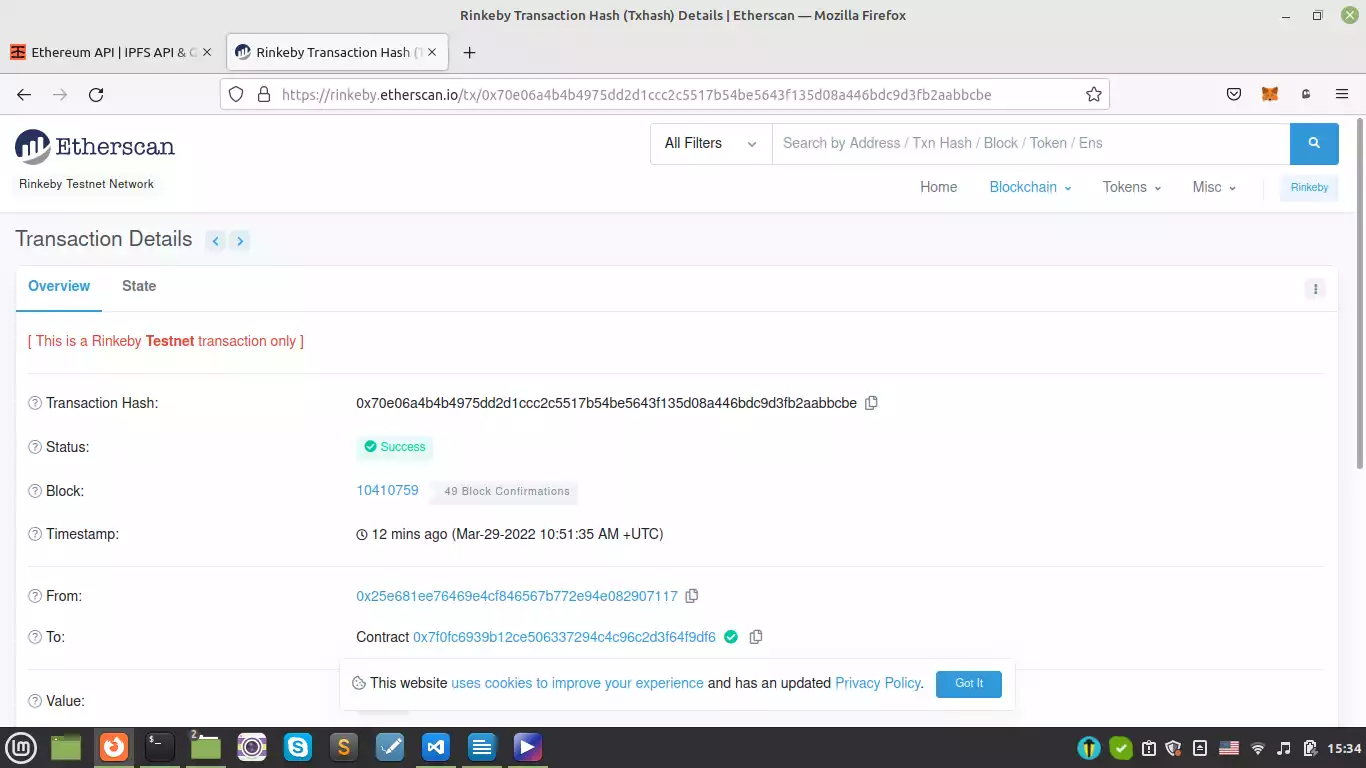
You can also track the above transaction from ( https://rinkeby.etherscan.io/) using the receipt transaction contract address that we have just printed on the terminal.
You can see 2 transactions are recorded. The first one is the one related to when we deployed the contract.
And the 2nd one is related to when we stored the number 38 in it.
Congratulations! We have finally managed to deploy a smart contract using Python Web3 tools on mainnet.
Our complete python code goes like this:
import json
from web3 import Web3
from solcx import compile_standard, install_solc
import os
from dotenv import load_dotenv

load_dotenv()

with open("./SimpleStorage.sol", "r") as file:
	simple_storage_file = file.read()

install_solc("0.6.0")
print("installed")

compiled_sol = compile_standard({
	"language": "Solidity",
	"sources": {"SimpleStorage.sol": {"content": simple_storage_file}},
			"settings": {
				"outputSelection": {
						"*": {
							"*": ["abi", "metadata", "evm.bytecode",
								"evm.bytecode.sourceMap"]
						}
				}
			},
		},solc_version="0.6.0",)

with open("compiled_code.json", "w") as file:
	json.dump(compiled_sol, file)

bytecode = compiled_sol["contracts"]["SimpleStorage.sol"]["SimpleStorage"]["evm"]["bytecode"]["object"]

abi = json.loads(compiled_sol["contracts"]["SimpleStorage.sol"]["SimpleStorage"]["metadata"])["output"]
	["abi"]

web3 = Web3(Web3.HTTPProvider(os.getenv("Infura_EndPoint")))
chain_id = 4

address = "0x25E681EE76469E4cF846567b772e94e082907117"
private_key = os.getenv("PRIVATE_KEY")

SimpleStorage = web3.eth.contract(abi = abi,bytecode = bytecode)

nonce = web3.eth.getTransactionCount(address)

transaction = SimpleStorage.constructor().buildTransaction({
			"chainId": chain_id,
			"gasPrice": web3.eth.gas_price,
			"from": address,
			"nonce": nonce,
		})

signed_txn = web3.eth.account.sign_transaction(transaction, private_key=private_key)
print("Deploying Contract...")

tx_hash = web3.eth.send_raw_transaction(signed_txn.rawTransaction)

print("Waiting for transaction to finish...")

tx_receipt = web3.eth.wait_for_transaction_receipt(tx_hash)

print(f"Done! Contract deployed to {tx_receipt.contractAddress}")

#interacting with the deployed contract

simple_storage = web3.eth.contract(address=tx_receipt.contractAddress, abi=abi)
print(f"Initial Stored Value {simple_storage.functions.retrieve().call()}")
greeting_transaction = simple_storage.functions.store(38).buildTransaction({
				"chainId": chain_id,
				"gasPrice": web3.eth.gas_price,
				"from": address,
				"nonce": nonce + 1,
			})

signed_greeting_txn = web3.eth.account.sign_transaction(
greeting_transaction, private_key=private_key)
tx_greeting_hash = web3.eth.send_raw_transaction(signed_greeting_txn.rawTransaction)
print("Updating stored Value...")
tx_receipt = web3.eth.wait_for_transaction_receipt(tx_greeting_hash)

print(simple_storage.functions.retrieve().call())
For explanations of the above code you can refer to the previous sections. Because this script is the same as the previous articles with the difference that we have changed the HTTP Provider, the chain id, account address, and the private key.
Summing Up
In this tutorial, we have got started with python web3 tools to be able to deploy our Solidity smart contracts outside of Remix IDE. The IDE that we have chosen to work with is VS Code. We also installed some dependencies to work with python web3 tools. Python web3 tools compile the Solidity smart contracts and create some JSON files containing the bytecode and opcodes and ABI which is necessary to deploy our contracts.
Besides, we learned how to use Ganache IDE as a simulated blockchain. We also used the RPC URI, chain id, test accounts, their addresses, and private keys to deploy the smart contract called simple storage. We have also managed to install the web3.py module.
Finally, we have managed to connect to the Infura host node as an alternative for Ganache simulated blockchain. As a result, we have dealt with a more realistic kind of blockchain. We have also used chainlist as a way to retrieve the chain id. Furthermore, As we have deployed our smart contract on the Rinkeby testnet, we checked Rinkeby Etherscan to check the records of our transaction on the Ethereum Rinkeby testnet blockchain.
Download this Article in PDF format

Care to Know Us More?
In Arashtad, we have gathered a professional team of developers who are working in fields such as 3D websites, 3D games, metaverses, and other types of WebGL and 3D applications.


