Working with Crowdfunding on Etherscan Using Brownie and Solidity
In this tutorial, we are going to implement the crowdfunding project folder and compile it. Then we are going to interact with the compiled and deployed crowdfunding contract on the Etherscan. There are a number of scripts that we are going to work on. They are helpful_scripts.py, deploy.py, brownie_config.yaml, Fundme.sol, and .env file.
Crowdfunding on Etherscan: the Essentials
If you have read the solidity smart contracts tutorial, you can remember how we wrote the FundMe.sol contract and how we deployed it using Remix IDE. As you know, Remix IDE is just for learning solidity and beginners and we need some other deployment tools such as Node.js or Python web3, or brownie to be able to run it in a real-world application.To set up the Fundme.sol contract inside Brownie, we take the following steps:1. Create a directory folder for the project:
mkdir brownie_fund_me
2. In the terminal:
brownie init
3. Inside the contracts folder, create a file called FundMe.sol and paste the FundMe smart contract that we wrote earlier in it.
Fundme.sol:
// SPDX-License-Identifier: MIT

pragma solidity >= 0.6.6 < 0.7.0;

import "@chainlink/contracts/src/v0.6/interfaces/AggregatorV3Interface.sol";
import "@chainlink/contracts/src/v0.6/vendor/SafeMathChainlink.sol";

contract FundMe {
	using SafeMathChainlink for uint256;
	mapping(address => uint256) public addressToAmountFunded;
	address[] public funders;
	address public owner;

	constructor() public {
		owner = msg.sender;
	}

	function fund() public payable {
		uint256 minimumUSD = 50 * 10 ** 18;
		require(getConversionRate(msg.value) >= minimumUSD, "You need to spend 	more ETH!");
		addressToAmountFunded[msg.sender] += msg.value;
		funders.push(msg.sender);
	}

	function getVersion() public view returns (uint256){
		AggregatorV3Interface priceFeed =
		AggregatorV3Interface(0x8A753747A1Fa494EC906cE90E9f37563A8AF630e);
		return priceFeed.version();
	}

	function getPrice() public view returns(uint256){
		AggregatorV3Interface priceFeed = AggregatorV3Interface
			(0x8A753747A1Fa494EC906cE90E9f37563A8AF630e);
		(,int256 answer,,,) = priceFeed.latestRoundData();
		return uint256(answer * 10000000000);
	}

	function getConversionRate(uint256 ethAmount) public view returns (uint256){
		uint256 ethPrice = getPrice();
		uint256 ethAmountInUsd = (ethPrice * ethAmount) / 1000000000000000000;
		return ethAmountInUsd;
	}

	modifier onlyOwner {
		require(msg.sender == owner);
		_;
	}

	function withdraw() payable onlyOwner public {
		msg.sender.transfer(address(this).balance);
		for (uint256 funderIndex=0; funderIndex < funders.length; funderIndex++){
			address funder = funders[funderIndex];
			addressToAmountFunded[funder] = 0;
		}
		funders = new address[](0);
	}
}
Deploy.py
4. In the scripts folder of the directory, create a deploy.py file with the following code , so that you can interact with the smart contract:
from brownie import FundMe
from scripts.helpful_scripts import get_account

def deploy_fund_me():
	account = get_account()
	fund_me = FundMe.deploy({"from":account})
	print(f"Contract deployed to {fund_me.address}")

def main():
	deploy_fund_me()
Helpful_scripts.py
5. Create another file named helpful_scripts.py and paste the below codes in it:
from brownie import network, config, accounts

def get_account():
	if network.show_active() == "development":
	return accounts[0]
else:
	return accounts.add(config["wallets"]["from_key"])
This piece of code helps deploy.py find the account it should connect to. In order to make it possible for deploy.py to import this file, you should create another file called __init__.py.
Brownie-config.yaml
6. In the main directory create a file named brownie-config.yaml and paste the below scripts in it.
dependencies:
# - @
	- smartcontractkit/[email protected]
compiler:
	solc:
		remappings:
			- '@chainlink=smartcontractkit/[email protected]'

dotenv: .env
wallets:
	from_key: ${PRIVATE_KEY}
We have defined the chainlink smart contract kit as a dependency to be able to use it afterwards. We have also defined using environment variables and reading from the private key.
.env file
7. Create a .env file and paste your private key and Infura Rinkeby id inside of it.
export PRIVATE_KEY=
export WEB3_INFURA_PROJECT_ID=
8. Now that all files are set up, in your terminal write:
brownie compile
Result:
Brownie v1.18.1 - Python development framework for EthereumDownloading from https://solc-bin.ethereum.org/linux-amd64/solc-linux-amd64-v0.6.12+commit.27d51765
100%|█████████████████████████████████████████████████████████████████████████████████████| 9.47M/9.47M [00:46<00:00, 204kiB/s]
solc 0.6.12 successfully installed at: /home/mohamad/.solcx/solc-v0.6.12
Compiling contracts...
Solc version: 0.6.12
Optimizer: Enabled Runs: 200
EVM Version: Istanbul
Generating build data...
- smartcontractkit/[email protected]/AggregatorV3Interface
- smartcontractkit/[email protected]/SafeMathChainlink
- FundMeProject has been compiled. Build artifacts saved at /home/mohamad/brownie_fund_me/build/contracts
Deploying the Crowdfunding Smart Contract:
9. The final step is to deploy the smart contract:
brownie run scripts/deploy.py --network rinkeby
Result:
Brownie v1.18.1 - Python development framework for EthereumBrownieFundMeProject is the active project.Running 'scripts/deploy.py::main'...
Transaction sent: 0xaffb135e4da5e5d52df7fb852194c47459f93614ad6dfdf098890c16c9138d58
Gas price: 1.000000019 gwei Gas limit: 396322 Nonce: 50
FundMe.constructor confirmed Block: 10428096 Gas used: 360293 (90.91%)
FundMe deployed at: 0xD13F9dA0C0AFA03B5115F2007863Ab87404fDA5dContract deployed to 0xD13F9dA0C0AFA03B5115F2007863Ab87404fDA5d
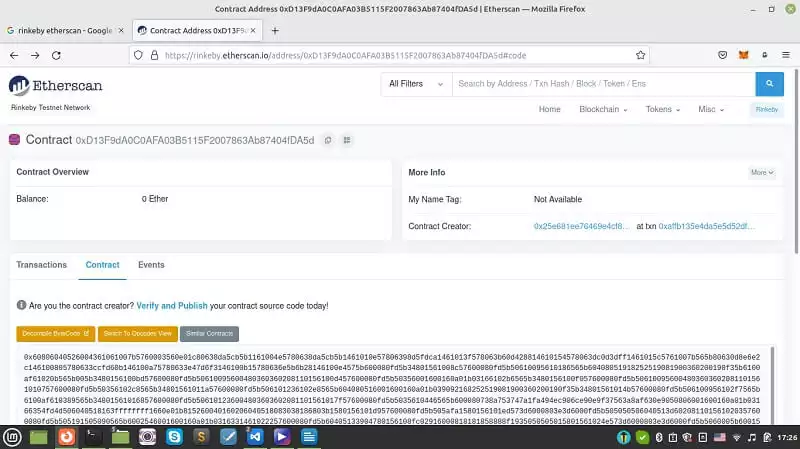
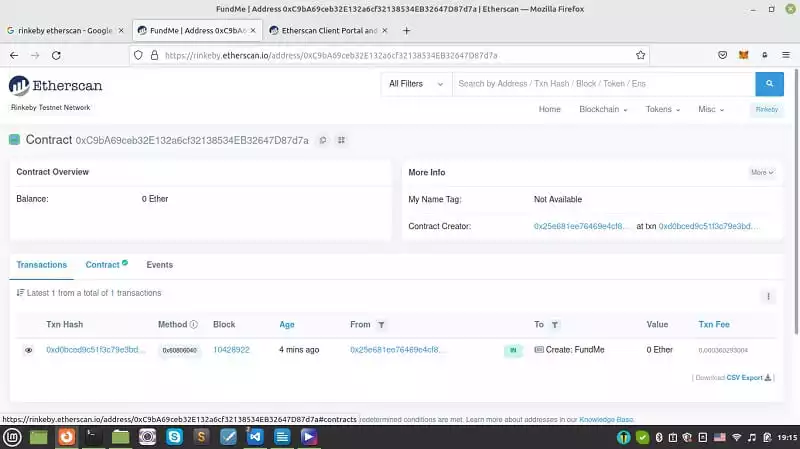
Now, we can go to Rinkeby Etherscan again and track our deployment. In the contract section, we will see:
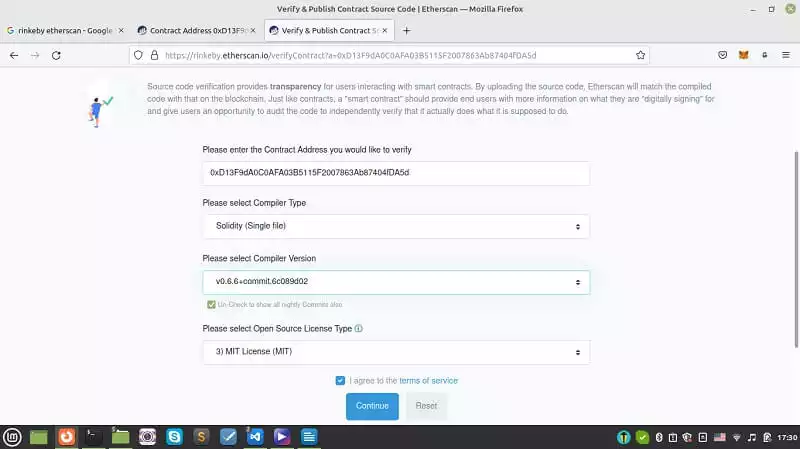
So far so good! But we have a problem here. We are not yet able to interact with the smart contract. To do this manually, you can click on verify and publish. On the new page, you enter the contract address, compiler type and its license and press continue.
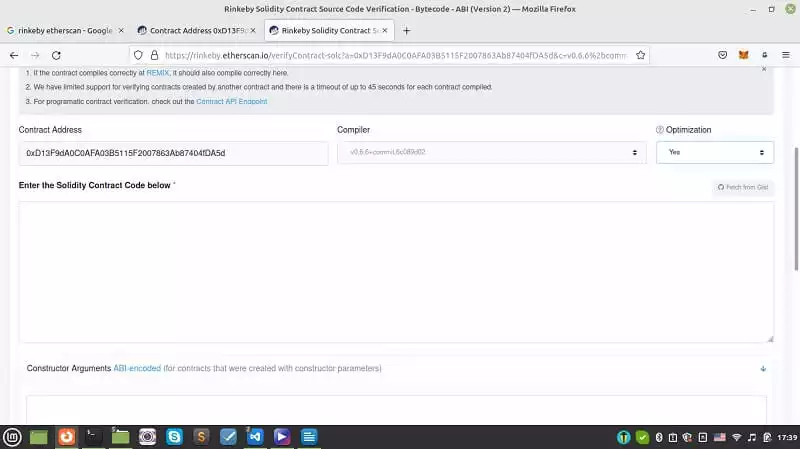
We can enter the solidity FundMe.sol contract code in the space given. Also do not forget to toggle optimization from no to yes.
We can copy and paste our smart contract. But there is a problem, Etherscan will not be able to identify chainlink AggregatorV3Interface.sol. We have a solution for this in the next section of our tutorial.
Crowdfuning on Etherscan: Getting An API Key
In this section, we are going to get an API key from etherscan.io and paste it into the .env file to be able to keep track of our crowdfunding smart contract on the Rinkeby chain Etherscan. Also, we're going to interact with the fund me smart contract with a simple-to-use interface. As you recall, we had a problem and it was that we couldn’t paste our code inside the box related to smart contracts because Etherscan could not identify the chainlink Aggregator. But, there is a solution for that.
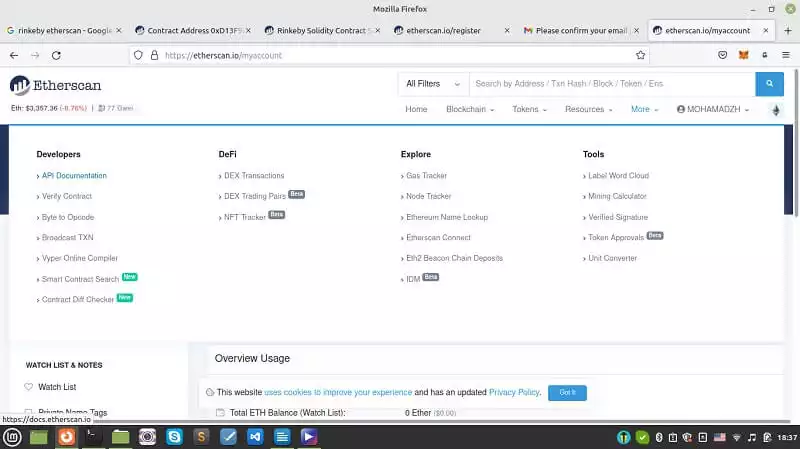
First, we should head over to etherscan.io and sign up for an account and then in the More tab Developers section click on API documentation:
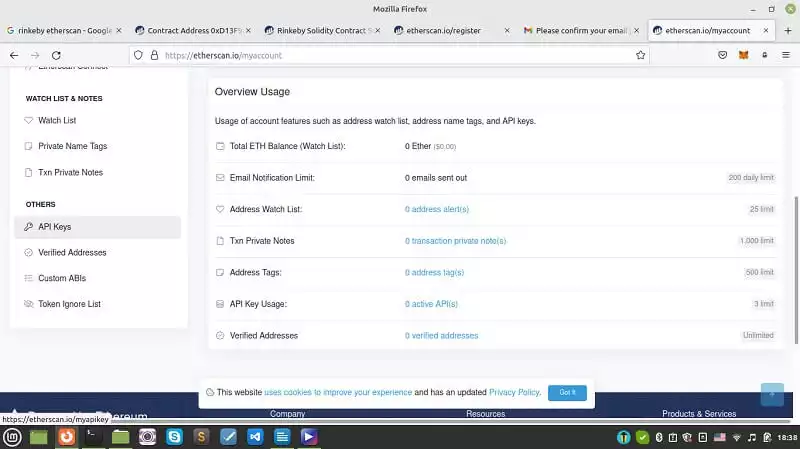
Then, on the left hand side bar, click on API keys:
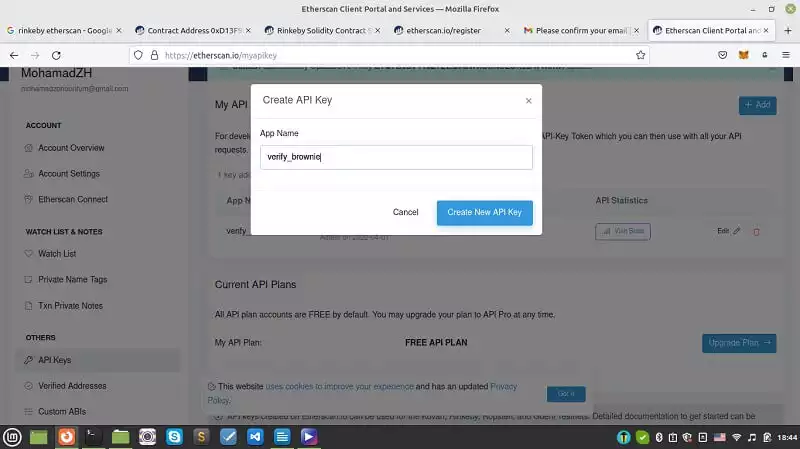
And add an API with the name verify_brownie:
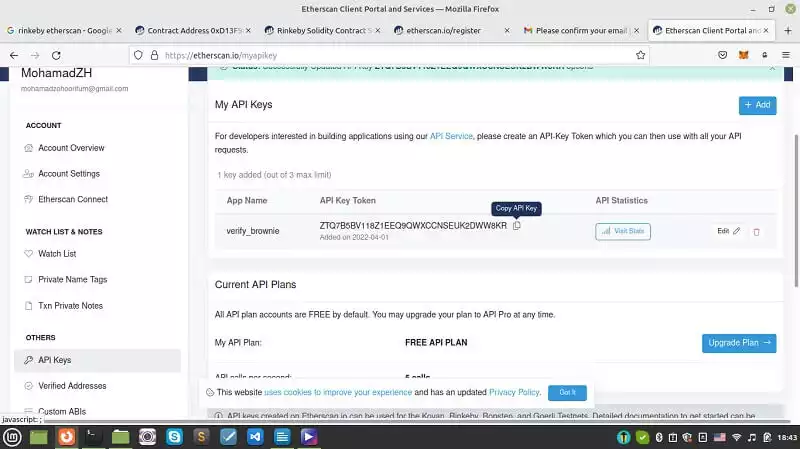
After adding an API key, copy it:
And paste it into the .env file like this:
export ETHERSCAN_TOKEN=
Also, in the deploy.py file, change:
fund_me = FundMe.deploy({"from":account})
To
fund_me = FundMe.deploy({"from":account},publish_source=True)
To be able to publish our code on Rinkeby Etherscan.
Now, it is time to run our code once more:
brownie run scripts/deploy.py --network rinkeby
Result:
Brownie v1.18.1 - Python development framework for EthereumBrownieFundMeProject is the active project.Running 'scripts/deploy.py::main'...
Transaction sent: 0xd0bced9c51f3c79e3bda4a150600159480c49ab8c7e7fb57b92112b3ee4efc80
Gas price: 1.000000013 gwei Gas limit: 396322 Nonce: 51
FundMe.constructor confirmed Block: 10428922 Gas used: 360293 (90.91%)
FundMe deployed at: 0xC9bA69ceb32E132a6cf32138534EB32647D87d7aWaiting for https://api-rinkeby.etherscan.io/api to process contract...
Verification submitted successfully. Waiting for result...
Verification complete. Result: Pass - Verified
Contract deployed to 0xC9bA69ceb32E132a6cf32138534EB32647D87d7a
Interacting on Rinkeby Etherscan:
Now, if we go to Rinkeby Etherscan and paste the address of the contract (given in the terminal) in the search bar, we will be able to see that the contract tab is checked:
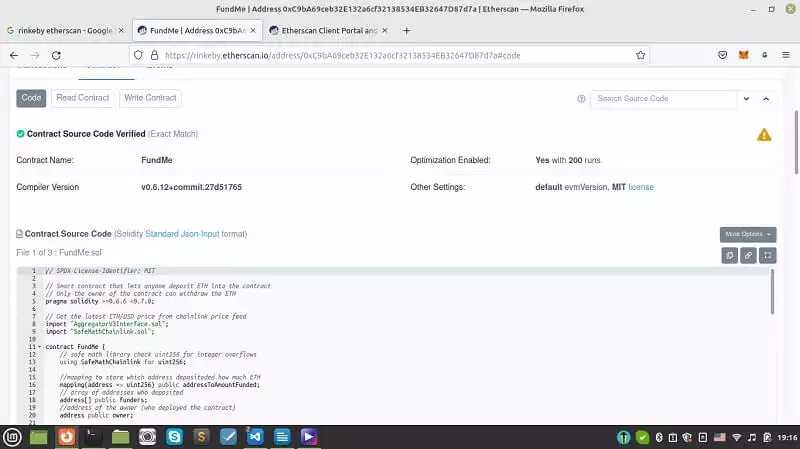
If you go to the contracts section, you will be able to see that the FundMe.sol is published with its chainlink dependency code. Also, ABI of the contract is published in another box.
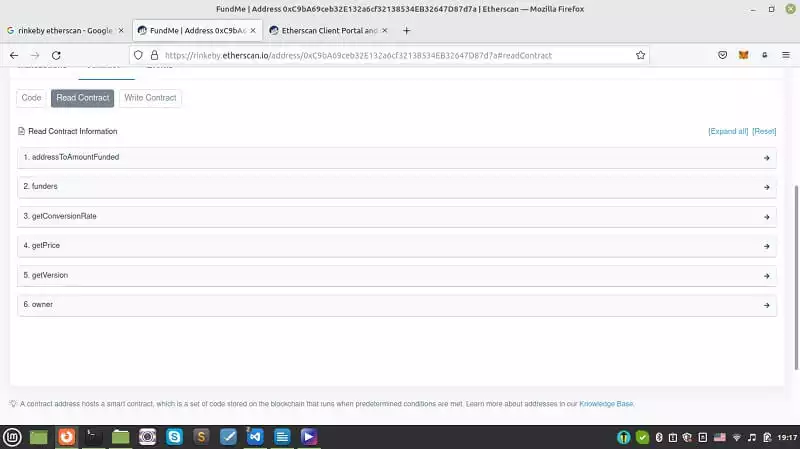
If we try posting the contract and press any of the keys related to public data, we will be able to retrieve them.
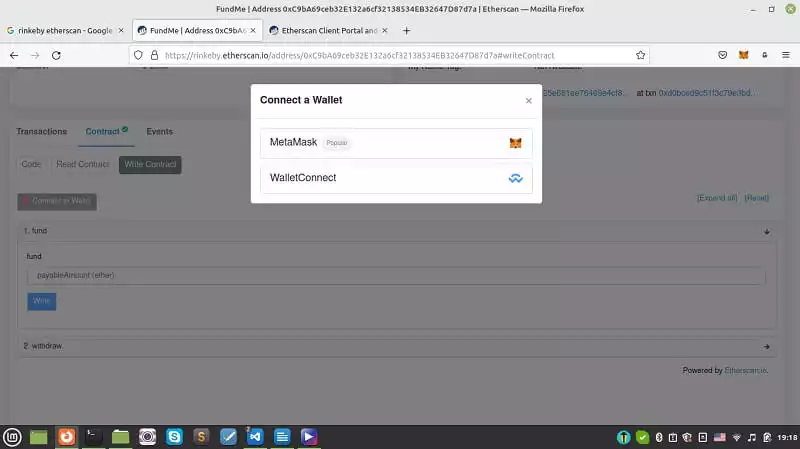
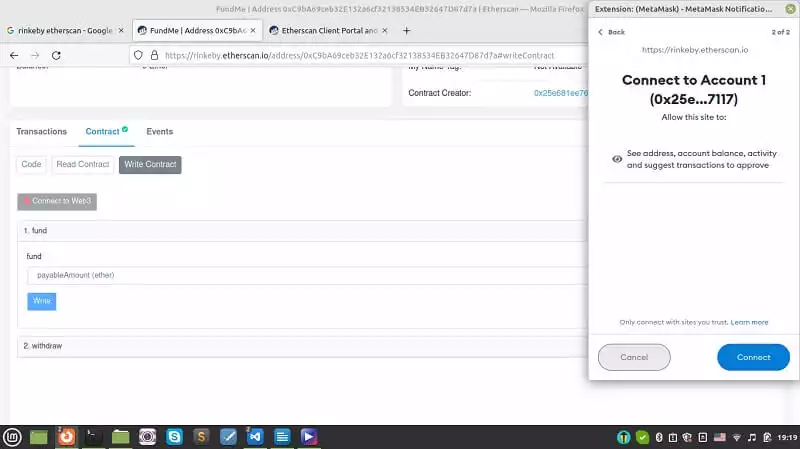
Also, if we go to write the contract and click on connect to web3, we can connect our Metamask wallet to Etherscan and fund the project using the test ethers in the Rinkeby account.
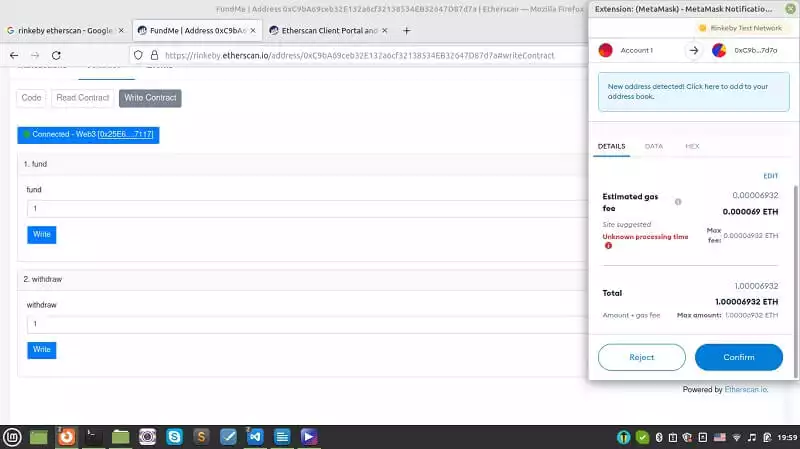
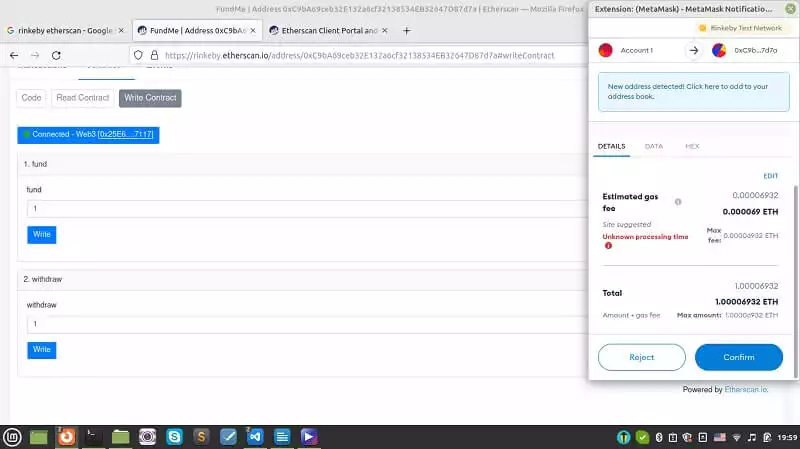
You can enter 1 in the box under fund and press the Write button and confirm the Metamask pop-up:
Once, the transaction has been confirmed, we can withdraw that 1 ether back into our account:
By doing the exact same process for the Mainnet account, we will be able to write and deploy a real-world smart contract!
Conclusion
In this article, we have managed to create and organize the crowdfunding project folder and compile it. Then, we started the interaction with the compiled and deployed the crowdfunding contract using the Etherscan. There are a number of scripts that we have worked on such as helpful_scripts.py, deploy.py, and brownie_config.yaml, Fundme.sol and .env file.
Finally, we have managed to completely interact with the Fundme.sol smart contract using the address we have got in the terminal at the time we de-ployed the Fundme.sol contract. In this interaction which is on the Rinkeby chain (Ethereum test network), we can fund the contract and withdraw the funds as the admin.
Download this Article in PDF format

Care to Know About Metaverse?
In Arashtad, we are providing custom services on 3d developments such as 3d websites, 3d models, metaverses and all 3d applications.

