Point Cloud Effect in Three JS
This tutorial will focus on an exciting topic called a point cloud. Technically, we use a point cloud for creating the polygons. Then using the normal of the polygons, we make the meshes. In Three JS, the point cloud is also used for aesthetics, which means we use the points instead of meshes to represent an object or a geometry. This style of representing the objects makes the design more beautiful and charming than the mesh representation. We achieve this goal by simply using the points material and adding the geometry and the material to the points instead of the mesh. Point cloud representation makes your design look more modern and smart. You can use this effect for technological and innovative items and products, giving them a more modern look. Moreover, the point-cloud-based design could provide a fantastic look for any other type of website other than technology or product based. Let’s give it a shot together!
A simple example from scratch:
We will get started with the main elements of a Three js scene, including the camera, the renderer, the scene, and the object. Before doing that, we use the Vite plugin to easily create all the folders and files you need to run the Three.js code. First off, create a folder in the directory of your projects by using the following commands:
mkdir PointCloud
cd PointCloud
Then, inside of the your project folder, create the necessary files and folders by
simply running the Vite plugin command:
npm create vite@latest
Then enter the name of the project. You can write the name of your project as the
name. And also the package (the name is arbitrary, and you can choose anything
you want). Then select vanilla as the framework and variant. After that, enter the
following commands in the terminal. Notice that here PointCloud is the project
folder’s name, and thus, we have changed the directory to PointCloud. The name
depends on the name you enter in the Vite plugin :
cd PointCloud
npm install
Afterward, you can enter the JavaScript code you want to write in the main.js file. So,
we will enter the base or template code for running every project with an animating
object, such as a sphere. Also, do not forget to install the Three.js package library
every time you create a project:
npm install three
The code (using the mappings together):
Now, enter the following script in the main.js file:
import * as THREE from 'three';
import { Mesh } from 'three';
import { OrbitControls } from '/node_modules/three/examples/jsm/controls/OrbitControls.js';
import Stats from '/node_modules/three/examples/jsm/libs/stats.module.js';
const scene = new THREE.Scene();
const camera = new THREE.PerspectiveCamera(75, innerWidth /innerHeight , 0.1, 1000);
const renderer = new THREE.WebGLRenderer({
     antialias : true
});
renderer.setSize(innerWidth, innerHeight);
document.body.appendChild(renderer.domElement);

//creating a TorusKnot
const geometry = new THREE.TorusKnotGeometry(10, 3, 300, 20 );

const material = new THREE.PointsMaterial({
     //color:0xffff00,
     size: 0.1
})

const TorusKnot = new THREE.Points(geometry,material);
scene.add(TorusKnot);
camera.position.z = 15;
new OrbitControls(camera, renderer.domElement);
window.addEventListener('resize', onWindowResize, false);

function onWindowResize() {
     camera.aspect = window.innerWidth / window.innerHeight;
     camera.updateProjectionMatrix();
     renderer.setSize(window.innerWidth, window.innerHeight);
     render();
}

const stats = Stats();
document.body.appendChild(stats.dom);
function animate() {
     requestAnimationFrame(animate);
     TorusKnot.rotation.y += 0.002;
     render();
     stats.update();
}
function render() {
     renderer.render(scene, camera);
}

animate();
Now if we save the code, and enter the following command in the terminal:
npm run dev
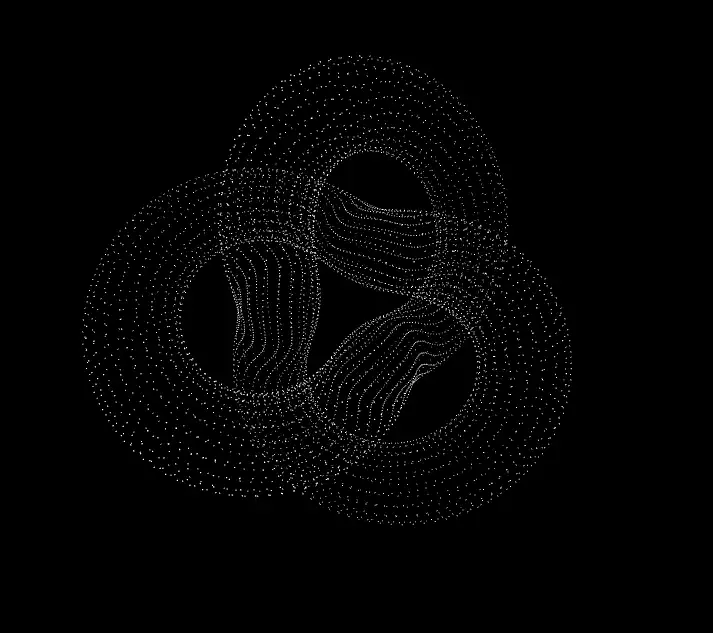
The above script will give the following result:Explaining the code:
To create the above point cloud effect, we made very few changes to a boilerplate code that we used to copy in all of our three.js scripts. One of these changes was using the PointsMaterial instead of MeshBasicMaterial. Then, by using the size property of the material, we set the size of the points to have enough visibility afterward, instead of using THREE.Mesh, we used THREE.Points to create the objects.
const geometry = new THREE.TorusKnotGeometry(10, 3, 300, 20 );
const material = new THREE.PointsMaterial({
     //color:0xffff00,
     size: 0.1
})
const TorusKnot = new THREE.Points(geometry,material);
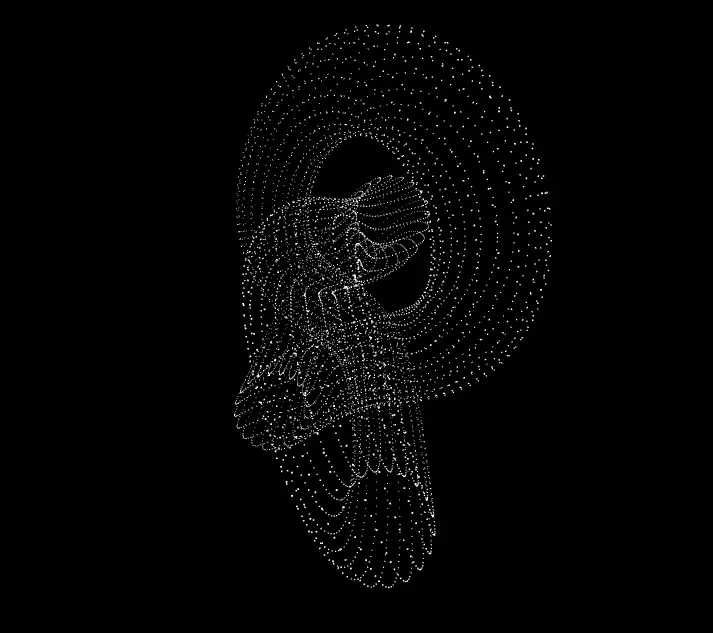
In the below photo, you can see another photo of the torus knot with point cloud
effect from another angle:Conclusion
In this tutorial, we learned how to create the point cloud effect using the points material in Three.js. This effect is very useful for designing modern websites and the concept of modern technology marketing. Creating such an effect is simple and, at the same time, clever. An object’s point cloud representation differs from the PCL loader or PCDLooader function, which loads the point cloud files. There are moments when we have the point cloud file of an object, and we want to import it, which is different from creating the points out of a geometry built in Three.js. If you have an object that you want to import and represent in the point cloud form, make sure you read our articles on the Loaders subject on this blog.Download this Article in PDF format

Arashtad Custom Services
In Arashtad, we have gathered a professional team of developers who are working in fields such as 3D websites, 3D games, metaverses, and other types of WebGL and 3D applications as well as blockchain developemnet.


