How to Automate Your Tasks and Design in Blender
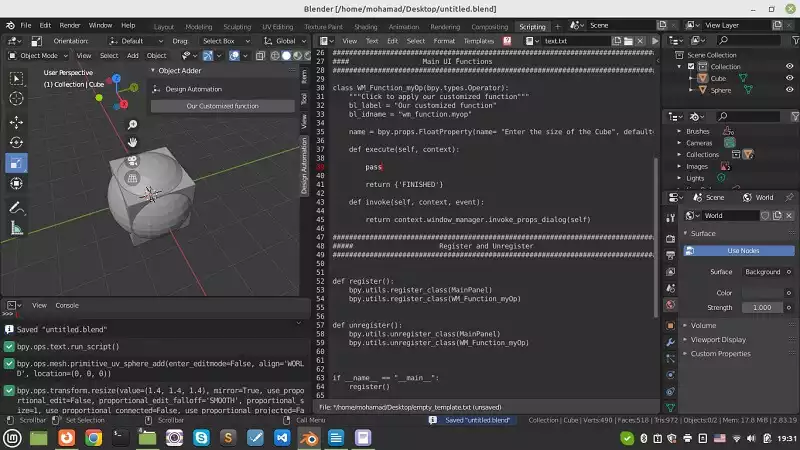
In this tutorial, you will see how Blender Python API could help you automate the tasks in Blender. So, You can skip many time-taking manual steps by scripting in the Blender Python. We are going to design a user interface to operate a certain number of tasks in a matter of seconds and at the same time make it easy for the user or designer to apply those tasks.
Introduction to Blender Python API
If you are familiar with the design processes in Blender, you must know that some design procedures can take hours or even days. So, you have to deal with some repeating tasks over and over again. That is when Blender Python API comes to our help. There are many times that you want to skip easily repeating but time-taking procedures and want them to boil down to only one button or some multiple buttons to make your life much easier and faster.In this tutorial, we are going to see how we can manage these tasks and how we can find scripts related to the different modifiers that are going to be used consecutively.
Note: Remember that the scripts we are using here are related to Blender version 2.83 and if you are working with any other versions, it is probable that the scripts might differ a little bit, but we will show you ways to find the proper functions if there are any differences at all.
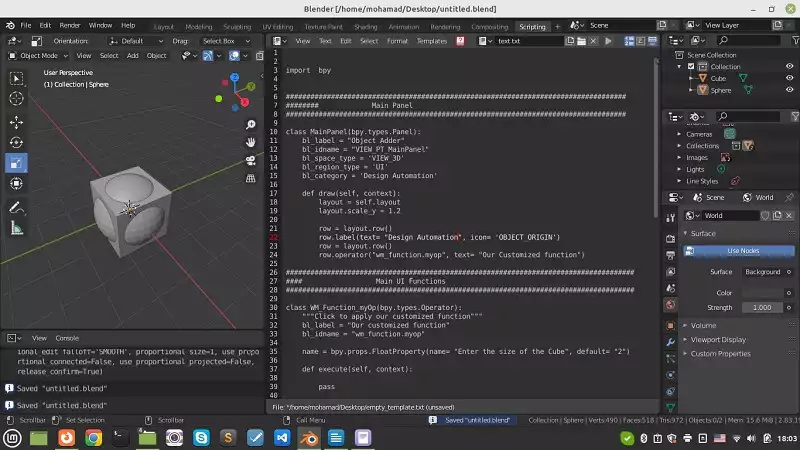
We start this tutorial with the most minimalistic functions and then try to build up our project to create a new valuable tool in Blender customized to hasten your designing procedures. Before we get started, we need to be familiar with some of the scripting tools provided in Blender. The first one is the scripting box which is created once you click on the scripting tab.
Designing the User Interface
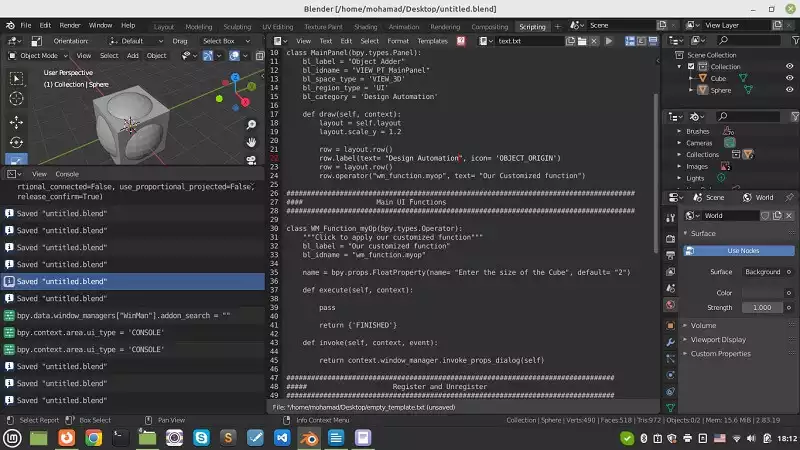
Now, let’s get started with creating a button to automate our designing tasks in Blender:First things first, we create a blank project. In other words, we create the front end of our customized function. Then write the backend of our project inside of our def execute the function. The following code is the simple front-end script that you need to start writing your API.
import  bpy

####################################################################
########             Main Panel
####################################################################

class MainPanel(bpy.types.Panel):
    bl_label = "Object Adder"
    bl_idname = "VIEW_PT_MainPanel"
    bl_space_type = 'VIEW_3D'
    bl_region_type = 'UI'
    bl_category = 'Design Automation'

    def draw(self, context):
        layout = self.layout
        layout.scale_y = 1.2
        row = layout.row()
        row.label(text= "Design Automation", icon= 'OBJECT_ORIGIN')
        row = layout.row()
        row.operator("wm_function.myop", text= "Our Customized function")
The above script is related to the front end of the button or buttons we are going to design. We create a class called MainPanel to design all of our buttons.
####################################################################
####                  Main UI Function
####################################################################

class WM_Function_myOp(bpy.types.Operator):
    """Click to apply our customized function"""
    bl_label = "Our customized function"
    bl_idname = "wm_function.myop"

    size = bpy.props.FloatProperty(name= "Enter the required property", default = "2")

    def execute(self, context):
        size = self.name
        return {'FINISHED'}

    def invoke(self, context, event):
        return context.window_manager.invoke_props_dialog(self)
In the above section of our script, we create a class for each button. Then we write our modifier functions inside of def execute (self, context). We also ask the users about the desired property for their design (like the size of an object). This job was done before executing the function by writing size = bpy.props.FloatProperty().
####################################################################
#####                     Register and Unregister
####################################################################

def register():
    bpy.utils.register_class(MainPanel)
    bpy.utils.register_class(WM_Function_myOp)

def unregister():
    bpy.utils.unregister_class(MainPanel)
    bpy.utils.unregister_class(WM_Function_myOp)
And finally, we should register and unregister all of the classes we have used inside of our script to be able to show them in the panel.
if __name__ == "__main__":
    register()
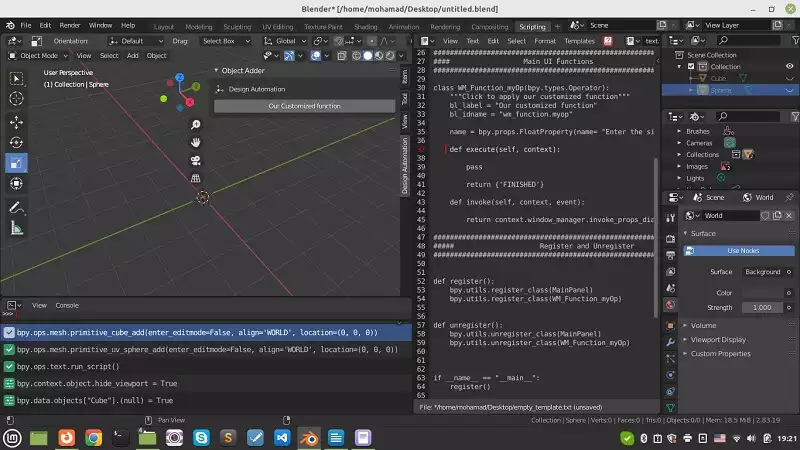
Also do not forget about the above if statement at the end of every project. Now if you run your code or press Ctrl + F, you will be able to see the panel and the corresponding button called Our Customized function.For example, we want to create a sphere and a cube and then resize them. First we add a cube and an sphere and resize our sphere by 1.4 in every direction:
bpy.ops.mesh.primitive_uv_sphere_add(enter_editmode=False, align='WORLD', location=(0, 0, 0))
bpy.ops.transform.resize(value=(1.4, 1.4, 1.4))
bpy.ops.mesh.primitive_cube_add(enter_editmode=False, align='WORLD', location=(0, 0, 0))
Notice that you can change the location of the object at the time of creating it, simply by changing the array of location attribute related to bpy.ops.mesh.primitive_uv_sphere_add or bpy.ops.mesh.primitive_cube_add.
You can do the above task for designing a large number of objects like designing a hundred cylinders or cubes or spheres. You can do this in a fraction of a second over and over again by using the above scripts and some Python for loops.
Final Word
In this tutorial, we have proposed an easier way to manage multi-tasking design processes. In other words, we managed to automate the tasks in Blender that take a much longer time if you want to apply them one by one. We have introduced Blender Python API as a tool to create a greater variety of tool boxes compared to the Blender modifiers.Download this Article in PDF format

Care to Know About Metaverse?
In Arashtad, we are providing custom services on 3d developments such as 3d websites, 3d models, metaverses and all 3d applications.
Arashtad Services
Drop us a message and tell us about your ideas.
Tell Us What You Need
Blockchain Development

