How to Add Background Using Orbit Controls in Three JS
One of the most exciting projects is adding a background scene in Three js. The scene could be retrieved from an HDRI image that has been captured in 360 degrees from a scene like the interior space of your room or an open ambient like a garden, jungle, or mountain. You can create any of these images yourself but that is not the subject of this tutorial. Instead, we are going to get one of these images from a website and using the orbit controls, give the user the capability of turning around the object and seeing everything in 360 degrees. We can also add objects to the scene and give them color or increase their metalness and decrease their roughness to become a sphere-shaped mirror.
Adding Background in Three JS
The possibilities are infinite and there is a lot of what you can do. For instance, you create an interior design of an empty room by adding 3d models of different furniture, carpets, rugs, and so on. This tutorial is the beginning of the creation of your favorite virtual world. You can make your dream home virtually and watch it from all different aspects. And as we have said in other Three js tutorials, once you start working with Three js, the sky is the limit.The Essentials You Need to Know Before Applying Three JS Background
We are going to get started with the simple elements of a Three js scene including the camera, the renderer, the scene, the object, and the light source (if necessary). Before we do that, we’d rather use the Vite plugin to be able to easily create all the folders and files that you need to run the Three.js code. First off, create a folder in the directory of your projects by using the following commands:
mkdir BackgroundScene
cd BackgroundScene
Then, inside the glowing sphere folder, create the necessary files and folders by simply running the Vite plugin command:
npm create vite@latest
Then, enter the name of the project. You can write glowingSphere as the name. However, the name is arbitrary and you can choose anything that you want. Then, select vanilla as the framework and variant. After that, enter the following commands in the terminal:
cd BackgroundScene
npm install
Afterward, you can enter the javascript code that you want to write in the main.js file. So, we will enter the base or template code for running every project with an animating object, such as an sphere. Besides, do not forget to install Three js package library every time you create a project:
npm install three
Now, enter the following script in the main.js file
import * as THREE from 'three';
import { Mesh } from 'three';
const scene = new THREE.Scene();
const camera = new THREE.PerspectiveCamera(75, innerWidth / innerHeight , 0.1, 1000);
const renderer = new THREE.WebGLRenderer({
     antialias : true
})
renderer.setSize(innerWidth, innerHeight);
document.body.appendChild(renderer.domElement);
//creating a sphere
const geometry = new THREE.SphereGeometry(5, 50, 50);
const material = new THREE.MeshBasicMaterial({
     color:0x3268F8
})
const sphere = new THREE.Mesh(geometry,material);
scene.add(sphere);
camera.position.z = 15;
function animate(){
     requestAnimationFrame(animate);
     renderer.render(scene,camera);
     sphere.rotation.y += 0.003;
}
animate();
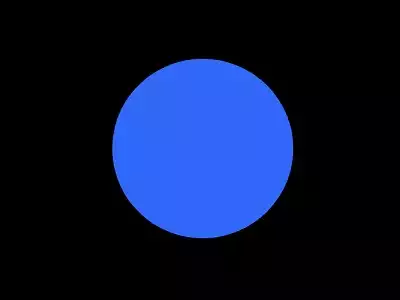
The above code can be used as a boilerplate for later projects. The output of this code will be blue sphere like the following photo. But, to be able to show that, you should write the following command in the terminal:
pm run dev
Setting Up Background Using Orbit Controls in Three JSNow, we want to create a background scene to be added, but before we do that, we need to change the rendering from animation to orbit controls so that instead of the rotation of the object, we can have control over changing the scene from the camera point of view. Doing as such gives us the capability to see the HDRI image from all angles. First off, we need to import the 2 following libraries:
import {OrbitControls} from "/node_modules/three/examples/jsm/controls/OrbitControls.js";
import Stats from "/node_modules/three/examples/jsm/libs/stats.module.js";
Then, what we will do is to change the rendering scripts at the end from:
function animate(){
     requestAnimationFrame(animate);
     renderer.render(scene,camera);
     sphere.rotation.y += 0.003;
}
Animate();
To:
const controls = new OrbitControls(camera, renderer.domElement);
window.addEventListener('resize', onWindowResize, false);
function onWindowResize() {
      camera.aspect = window.innerWidth / window.innerHeight;
      camera.updateProjectionMatrix();
      renderer.setSize(window.innerWidth, window.innerHeight);
      render();
}
const stats = Stats();
document.body.appendChild(stats.dom);
function animate() {
      requestAnimationFrame(animate);
      render();
      stats.update();
}
function render() {
      renderer.render(scene, camera);
}
animate();
Now we should be able to orbit around the object. The next thing we should do is to change the material from basic to standard and create the mirror effect:
const geometry = new THREE.SphereGeometry();
const material = new THREE.MeshStandardMaterial({
      color: 0xffffff,
})
material.roughness = 0;
material.metalness = 1;
const cube = new THREE.Mesh(geometry, material);
scene.add(cube);
Finishing the Background Project
Finally, we get to the most exciting part and that is adding the HDRI image to the background. To do this, we need to first find one of these images from a website like https://polyhaven.com/. Afterward, we should create a folder called images and paste the HDRI image into it. In the end, add the following scripts to be able to render the background in the scene:
import {RGBELoader} from "/node_modules/three/examples/jsm/loaders/RGBELoader.js";
renderer.toneMapping = THREE.ACESFilmicToneMapping;
renderer.toneMappingExposure = 0.6;
renderer.outputEncoding = THREE.sRGBEncoding;
new RGBELoader().load("/images/solitude_4k.hdr", function(texture){
      texture.mapping = THREE.EquirectangularReflectionMapping;
      scene.background = texture;
      scene.environment = texture;
})
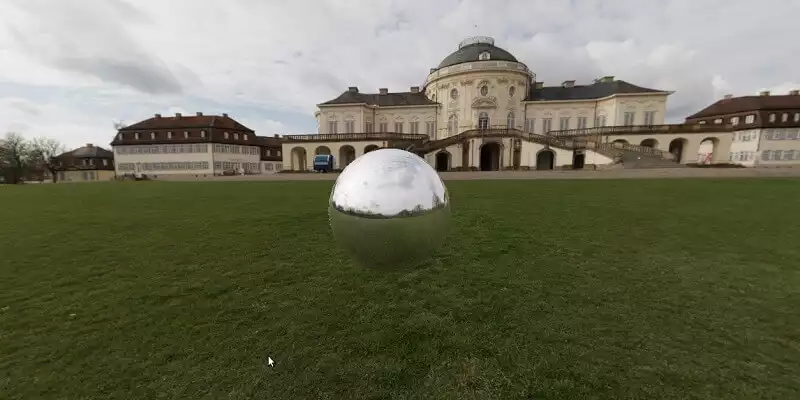
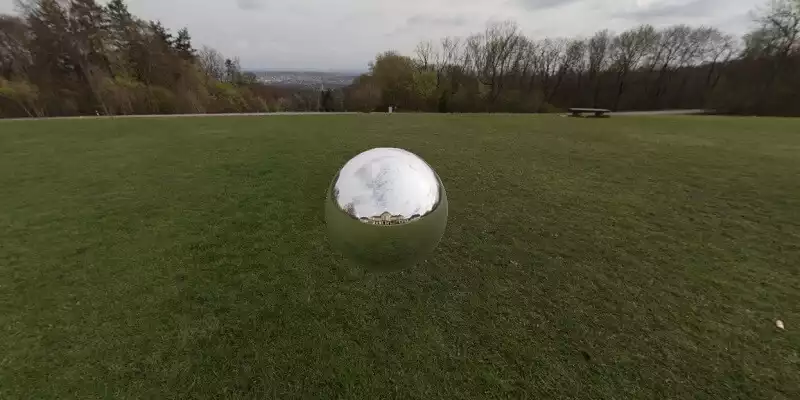
Now, if we save the script, the result will be:
import {OrbitControls} from "/node_modules/three/examples/jsm/controls/OrbitControls.js";
import Stats from "/node_modules/three/examples/jsm/libs/stats.module.js";
function animate(){
requestAnimationFrame(animate);
renderer.render(scene,camera);
sphere.rotation.y += 0.003;
}
Animate();
const controls = new OrbitControls(camera, renderer.domElement);
window.addEventListener('resize', onWindowResize, false);
function onWindowResize() {
camera.aspect = window.innerWidth / window.innerHeight;
camera.updateProjectionMatrix();
renderer.setSize(window.innerWidth, window.innerHeight);
render();
}
const stats = Stats();
document.body.appendChild(stats.dom);
function animate() {
requestAnimationFrame(animate);
render();
stats.update();
}
function render() {
renderer.render(scene, camera);
}
animate();
const geometry = new THREE.SphereGeometry();
const material = new THREE.MeshStandardMaterial({
color: 0xffffff,
})
material.roughness = 0;
material.metalness = 1;
const cube = new THREE.Mesh(geometry, material);
scene.add(cube);
import {RGBELoader} from "/node_modules/three/examples/jsm/loaders/RGBELoader.js";
renderer.toneMapping = THREE.ACESFilmicToneMapping;
renderer.toneMappingExposure = 0.6;
renderer.outputEncoding = THREE.sRGBEncoding;
new RGBELoader().load("/images/solitude_4k.hdr", function(texture){
texture.mapping = THREE.EquirectangularReflectionMapping;
scene.background = texture;
scene.environment = texture;
})
Wrapping Up
In this tutorial, we have managed to add the background to the scene. To do this, we first started with the Vite plugin and a boilerplate code that we have used in most of our Three js projects. Then, we removed the rotation animation and instead of that, we added the orbit controls for the users to be able to see any angle of the scene they want using their cursor. The next thing that we did was to change the material of the object from basic to standard so that we could then add the mirror effect to the surface of the sphere.To make this happen, we set the metalness to 1 and the roughness to 0. After that, we looked for an HDRI image and added it to our directory. Eventually, we wrote the scripts related to adding the background scene and the result was astonishing! Of course, you can do the same process for the interior design of a room and add some realistic furniture and other elements to the background scene which is the room and create your own version of virtual reality.
Download this Article in PDF format

Curious about What We’re Up To?
In Arashtad we provide custom services in various design and development fields. 3D websites, 3D games, metaverses, and other types of WebGL and 3D applications are just some of our expertise.

