Three.js Object3D: A Tool to Manipulate Objects
The main purpose of this tutorial is to make you familiar with the steps we take to create a very simple project in Three.js. Then, we run it and then manipulate the scene including the object, the camera, and the light or lights depending on the use case. Of course, this tutorial is for beginners who want to take their very first steps into the world of Three.js Object3D and start some simple manipulations on the scene.
Manipulating Objects Using Three.js Object3D
In this article, we are going to cover the basics of creating an object, camera, and lights. Then, we’ll start manipulating objects and see the different effects we can create on the objects using the functions provided by Three.js.A scene is where you place the objects, the camera, and lights, a space that you render the objects in, and in general where you determine what and where the elements should be placed. Each scene has three main elements:
- The camera
- The object or objects
- The light source or the light sources
A Simple Project to Check Three.js Object3D
First off, make sure you have npm installed. You can start your first project by git cloning one of the simple Three.js projects to find a boilerplate for further development. Most of these projects can be found on Github, animate simple objects like a cube, sphere, torus, and so on. The animation is usually rotation.Running these projects and developing them step by step by changing some of the features about rendering, lighting, camera perspective, the color of the objects, textures, animations, and so on will help you find the necessary tools to design more complex objects. We start our first project by git cloning one of the Github repositories. To do so, enter the following command in the terminal:
mkdir Starting_Three
cd Starting_Three
git clone
https://github.com/designcourse/threejs-webpack-starter
Then, enter the following commands one by one to install the dependencies:
npm install
npm install webpack-dev-server -g
Now, change the directory to threejs-webpack-starter:
cd threejs-webpack-starter
Then, enter the followings one by one to get a pre-designed 3D animated torus:
npm i
npm run dev
npm run build
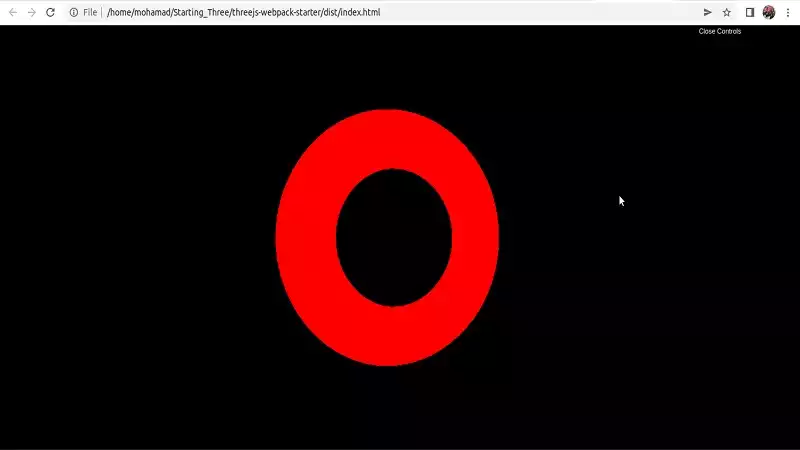
And you will be able to see the animated (rotating) torus like this in your browser:src folder, script.js file, you will some
scripts that we are going to modify later.The Shape of the Object
The shape of the object can be any geometrical shape available on the Three.js official documentation website athttps://threejs.org/docs. The most famous ones are box, sphere, torus and so on. We want to modify the raw script using the below code for defining the geometry. Notice that you should replace it with the const geometry in the raw code.
const geometry = new THREE.BoxGeometry(1, 1, 1);
Second of all, we can change the material from basic to standard by writing:
const material = new THREE.MeshStandardMaterial();
Instead of:
const material = new THREE.MeshBasicMaterial();
And then we can apply the metalness , roughness and color effects:
material.metalness = 0.7;
material.roughness = 0.6;
material.color = new THREE.Color(0xB1E1FF);
The next thing that we should do is to modify the renderer a little bit from:
const renderer = new THREE.WebGLRenderer({
 canvas: canvas
})
To:
const renderer = new THREE.WebGLRenderer({
 canvas: canvas,
 alpha: true
})
The light in Three.js Object3D Scripts
There are many different kinds of lights in Three.js and we have covered a full tutorial on that in an article. Here we use Rect light which works the same way as a light coming from a window. We set the color as white and determine the position of the light in addition to the place the light is oriented towards:
const width = 20;
const height = 20;
const intensity = 5;
const rectLight = new THREE.RectAreaLight( 0xffffff, intensity, width, height );
rectLight.position.set(5, 5, 5);
rectLight.lookAt(0.5, 0.5, 0.5);
scene.add(rectLight);
The Camera in Three.js Object3D Scripts
The camera is another element of the scene that you can set the position of it in the Three.js scripts. The position position of the camera is like the eye of the viewer. So you can either change the position of the object relative to camera or vice versa. Both ways you will get the same out put.
const camera = new THREE.PerspectiveCamera(75, sizes.width / sizes.height, 0.1, 100);
camera.position.x = 0;
camera.position.y = 0;
camera.position.z = 2;
scene.add(camera);
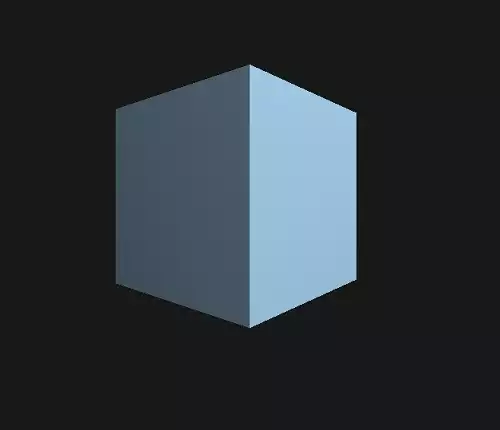
By saving the code, you will get:Final Thought
In this article, we have introduced the key elements of every scene including the camera, the object, and the light. In addition to that, we have provided the guides for creating the very first project you can get started in Three.js. Then we started manipulating the raw code which at first showed the tube with mesh basic and a simple point light and then we changed the geometry to cube, changed the color, the light and finally explained the codes related to each one of the elements in the scene.Download this Article in PDF format

Curious about What We’re Up To?
In Arashtad we provide custom services in various design and development fields. 3D websites, 3D games, metaverses, and other types of WebGL and 3D applications are just some of our expertise.


