How to Instantly Translate An Object in Blender
To Translate an object to the place we visually determine by eyeballing in Blender is a time-taking process especially when we are working with a great number of objects. In this tutorial, we are going to see how we can instantly move an object to the desired location we specify with the cursor. To do so, we first need to retrieve the point, and then using the acquired coordinates of the point, we can change the location of the object.
Translate An Object to A Special Point in Blender
Translating an object to the place we visually determine by eyeballing is a time-taking process especially when we are working with a great number of objects. In this tutorial, we are going to see how we can instantly move an object to the desired location we specify with the cursor. To do so we first need to retrieve the point and then using the acquired coordinates of the point, we can change the location of the object.
import  bpy
import bmesh
import math
####################################################################
#####                Utility Functions
####################################################################

def object_closest_point_mesh(p, obj):
    result, location, normal, face_index = obj.closest_point_on_mesh(p)
    assert result, "Can't find closest point on mesh"
    location = location.to_tuple()
    normal = normal.to_tuple()
    return location + normal  # return tuple of 6 floats

def obj_transform(filename, obj_name, size, location, angle):
    ob = bpy.context.scene.objects[obj_name]       # Get the object
    bpy.ops.object.select_all(action='DESELECT') # Deselect all objects
    bpy.context.view_layer.objects.active = ob   # Make the cube the active object
    ob.select_set(True)
    obj = bpy.data.objects[obj_name]
    obj.location = location
    bpy.ops.transform.rotate(value=angle, orient_axis='Z',
        orient_type='GLOBAL',
        orient_matrix=((1, 0, 0), (0, 1, 0), (0, 0, 1)),
        constraint_axis=(False, False, True))

def object_put_part(part_name, point, obj, scale, obj_name):
    vx,vy,vz,a,b,c = object_closest_point_mesh(point, obj)
    a1 = math.atan2(b, a)
    obj_transform(part_name, obj_name, scale, (point[0], point[1], point[2]), a1)
The above functions will get the specified point and translate our object part_name on the main object obj.
def get_vertex():
    bm = bmesh.new()
    ob = bpy.context.active_object
    bm = bmesh.from_edit_mesh(ob.data)
    points = []
    for v in bm.verts:
        if (v.select == True):
            obMat = ob.matrix_world
            points.append(obMat @ v.co)
    for p in points:
        pOb = bpy.data.objects.new("VertexPoint", None)
        bpy.context.collection.objects.link(pOb)
        pOb.location = p
    return p
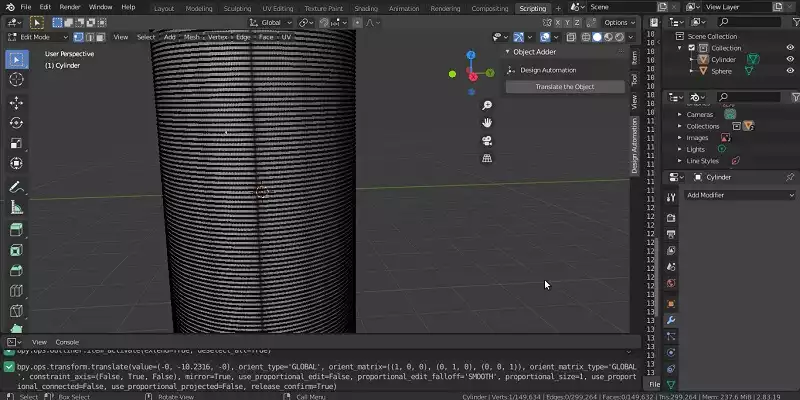
The above function will get the vertex we specified and return its data. The data contains the coordinates of the point that has been selected. Here, we do not need the orientation of the normal object. Otherwise, we would have had to use another script to be able to retrieve the data of the normal vector as well.
def delete_object(objName):
    bpy.ops.object.select_all(action='DESELECT')
    bpy.data.objects[objName].select_set(True) # Blender 2.8x
    bpy.ops.object.delete()

def get_object_by_name(obj_name):
    assert obj_name in bpy.data.objects, "Error getting object by name:{}".format(obj_name)
    obj = bpy.data.objects[obj_name]
    return obj

####################################################################
########             Main Panel
####################################################################

class MainPanel(bpy.types.Panel):
    bl_label = "Object Adder"
    bl_idname = "VIEW_PT_MainPanel"
    bl_space_type = 'VIEW_3D'
    bl_region_type = 'UI'
    bl_category = 'Design Automation'

    def draw(self, context):
        layout = self.layout
        layout.scale_y = 1.2

        row = layout.row()
        row.label(text= "Design Automation", icon= 'OBJECT_ORIGIN')
        row = layout.row()
        row.operator("wm_function.myop", text= "Translate the Object")

####################################################################
####                  Main UI ّFunctions
####################################################################

class WM_Function_myOp(bpy.types.Operator):
    """Go to edit mode and determine the point then Click the button"""
    bl_label = "Our customized function"
    bl_idname = "wm_function.myop"

    scale = bpy.props.FloatProperty(name= "Enter the scale of lattice", default= 1)

    def execute(self, context):

        Scale = self.scale
        point = get_vertex()
        bpy.ops.object.editmode_toggle()
        obj = get_object_by_name('Cylinder')
        object_put_part('Sphere', point, obj, Scale, 'Sphere')
        delete_object("VertexPoint")
        return {'FINISHED'}

    def invoke(self, context, event):
        return context.window_manager.invoke_props_dialog(self)
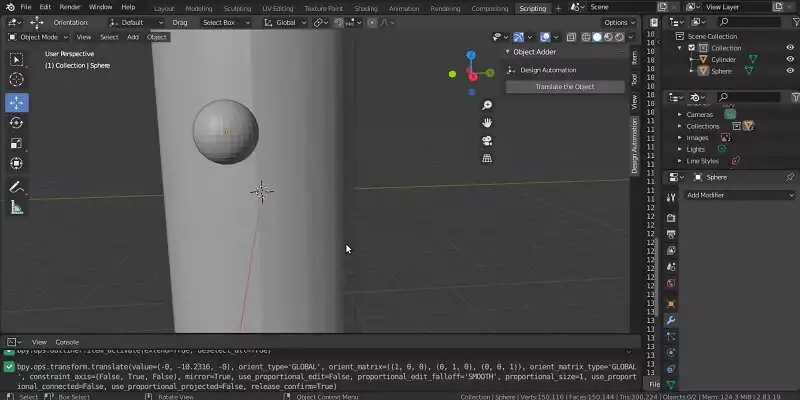
In the above def execute function, we use the get vertex function to get the data of the point that the user specifies. Then, use object_put_part to translate the object that we want to translate.
####################################################################
#####                     Register and Unregister
####################################################################


def register():
    bpy.utils.register_class(MainPanel)
    bpy.utils.register_class(WM_Function_myOp)

def unregister():
    bpy.utils.unregister_class(MainPanel)
    bpy.utils.unregister_class(WM_Function_myOp)

if __name__ == "__main__":
    register()
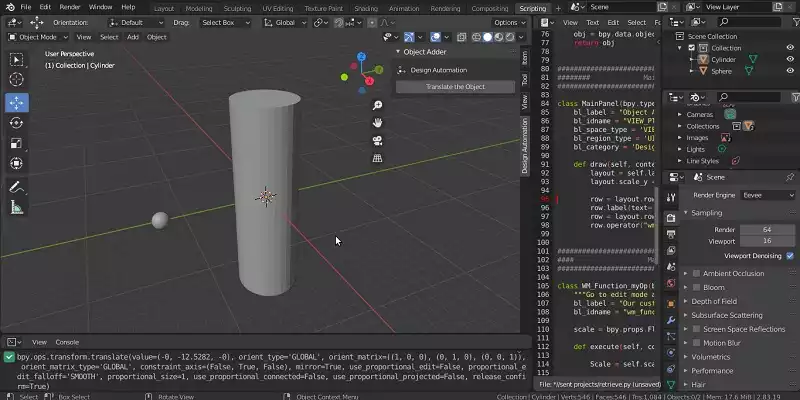
Now, if we test our UI by determining a point on the main object:Translate An Object in Blender: Final Word
In this tutorial, we have managed to create a tool in Blender that will help us translate (change the location of the object) using the point specified by the user on the object. This tool is very useful for designing complex 3D models especially if we want to save some time for the creativity of the design rather than operating time-taking tasks.Download this Article in PDF format
Check Out Our Services
In Arashtad, we’re working on 3D games, metaverses, and other types of WebGL and 3D applications with our 3D web development team. However, our services are not limited to these. Back-end developments, front-end developments, 3d modeling, and animations are in our arsenal too.

